
Hey peeps, apologies for the lack of updates since my Part I blog entry cos I've been swamped with work, and life in general. Nonetheless, I've been real diligent in keeping track of my skin condition after each treatment with The Clifford Clinic.
I've been receiving a number of queries via email and blog alike on my skin condition, so I reckon it's high time now for Part II of my acne treatment update. (:
This blog entry will focus on my 2nd AGNES Treatment and 7 sessions of Q-switch laser treatments, so it's gonna be a lengthyyyyyyyyy post. Do pardon me should you find my post too image heavy, 'cos what's an acne recovery journey post without raw and untouched photos?
Note: Photos below were not subjected to any forms of filter or spots editing, other than re-sizing and covering of eyes in some photos.
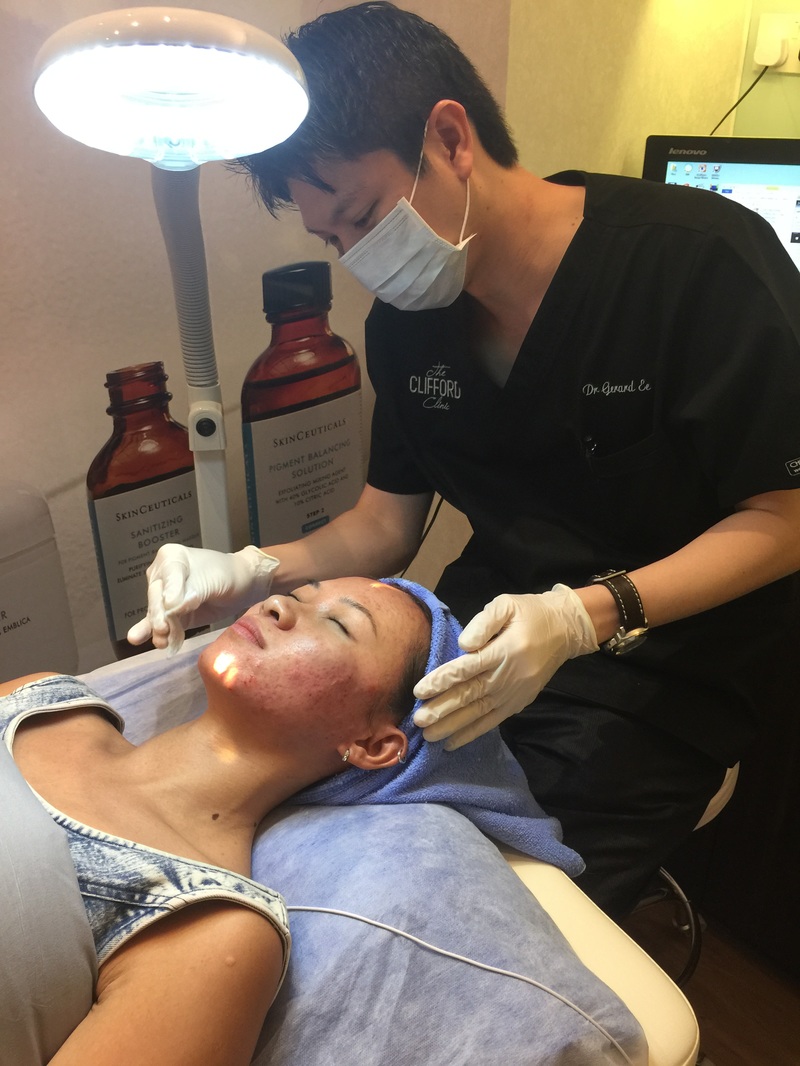
Having consulted Dr. Gerard Ee in June 2015, he recommended a series of laser treatments to solve my skin woes - AGNES Acne Treatment and Q-Switch Laser Treatments.
For those who have yet to read Part I of my blog entry on AGNES Acne Treatment, do click here!
Dr. Gerard put me on Q-switch laser journey one week after my 1st AGNES Acne treatment to target the redness and acne marks.
What is Q-Switch Laser Treatment?
Q-Switch Laser is one of the most technologically advanced lasers. The laser works by delivering clinical light quickly with intense energy. The pulses are absorbed by the treated area, breaking down the pigments into smaller pigments, which are then eliminated by the body's natural lymphatic system.
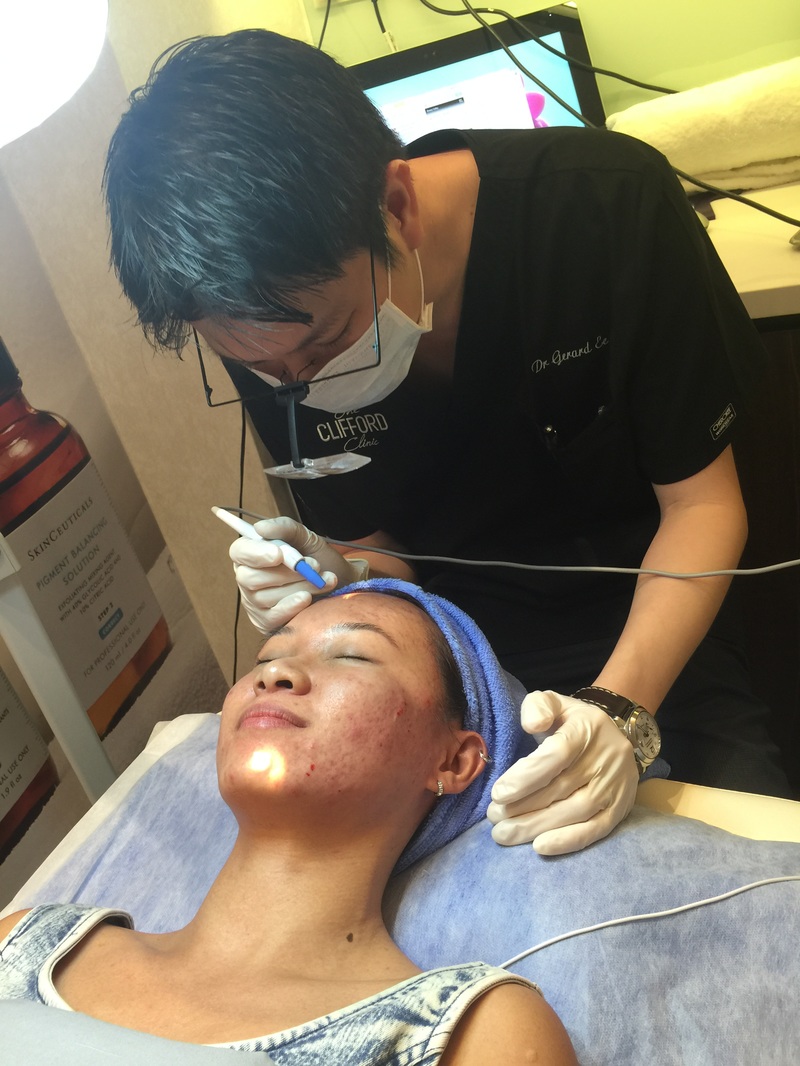
No numbing cream is required and the entire procedure lasts for 10 minutes. I love how fuss-free the laser treatment is and I'm advised by Dr. Gerard to go for one laser session every 2 weeks to expedite skin rejuvenation and healing of my acne marks.
I love how candid and honest Dr.Gerard is to his patients, not just to me but to my friends whom I have recommended to his clinic as well. No flowery language or hard-selling of package by him. For my case, he shared that even though Q-switch laser treatments will not help me to achieve a 100% acne marks clearance, but I should expect at least a 75%-90% clearance and lightening of my acne marks and brown sun spots. To me, 70% clearance is already deemed an achievement considering my brutal acne condition. Dr. Gerard gave me assurance that Q-switch laser will reduce the acne marks after any pimples breakout, at the same promoting brighter and luminous skin! ^^
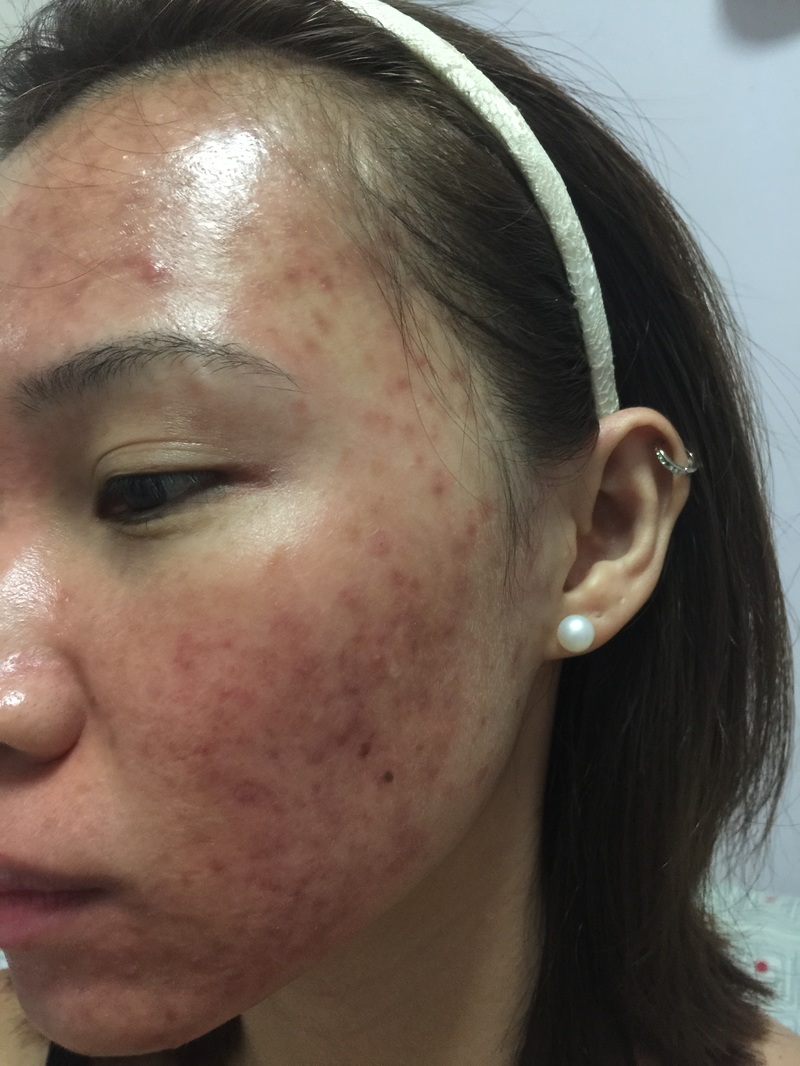
11th June (1st Q-switch)
My 1st Q-switch laser treatment saw me leaving the treatment room with a BURNT / "CHAO-TA" look. I certainly wasn't expecting that! I looked like a fried lobster!
I love how candid and honest Dr.Gerard is to his patients, not just to me but to my friends whom I have recommended to his clinic as well. No flowery language or hard-selling of package by him. For my case, he shared that even though Q-switch laser treatments will not help me to achieve a 100% acne marks clearance, but I should expect at least a 75%-90% clearance and lightening of my acne marks and brown sun spots. To me, 70% clearance is already deemed an achievement considering my brutal acne condition. Dr. Gerard gave me assurance that Q-switch laser will reduce the acne marks after any pimples breakout, at the same promoting brighter and luminous skin! ^^
11th June (1st Q-switch)
My 1st Q-switch laser treatment saw me leaving the treatment room with a BURNT / "CHAO-TA" look. I certainly wasn't expecting that! I looked like a fried lobster!

Don't believe? See below for comparison.
A little pity that the camera didn't capture the actual skin tone in the resulting photos. Trust me when I said my face looked "CHAO-TA"!
A little pity that the camera didn't capture the actual skin tone in the resulting photos. Trust me when I said my face looked "CHAO-TA"!

Having seen how burnt / "chao ta" my face was, Dr. Gerard gave me a complimentary Casmara green mask to sooth and provide calmness to my skin.
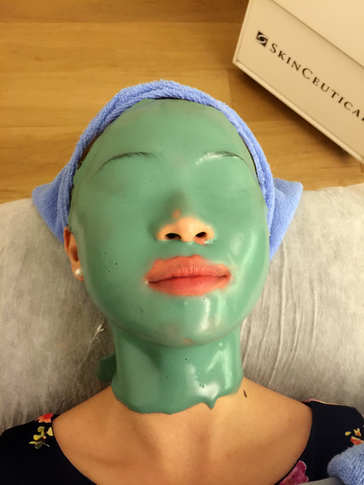
Redness has toned down albeit a subtle one with possibly short masking time, and yes, I had to deal with those unwanted stares on my way home cos I looked like SHIT...
Pain Level?
Q-switch laser treatment is mildly comfortable and the sensation is akin to having rubber band snapping on your skin. On a scale of 1 to 10, I would rate the pain level a 1/10.
Should you have a lower pain threshold level, do consider giving yourself a light slap to both sides of your face to desensitize yourself to the laser treatment sensation. HAHAHA. :p
Throughout the laser treatment, you might experience a burnt smell. The first time I did this laser treatment, I thought Dr. Gerard accidentally burnt off certain region of my skin. :/ Lol. He later explained that the burnt smell is only normal since facial hairs are being stinged.
Downtime?
If you have skin as sensitive as a razor mouse like mine, downtime for this treatment will probably take 2-3 hours for the redness to subside. Else, the treatment is highly effective with minimal downtime! Perhaps you might experience a pinkish flush for half an hour or so, but you will be able to apply make-up immediately after that.
If you have skin as sensitive as a razor mouse like mine, downtime for this treatment will probably take 2-3 hours for the redness to subside. Else, the treatment is highly effective with minimal downtime! Perhaps you might experience a pinkish flush for half an hour or so, but you will be able to apply make-up immediately after that.
Recovery after 1st Q-switch laser (12th June - 24th June)
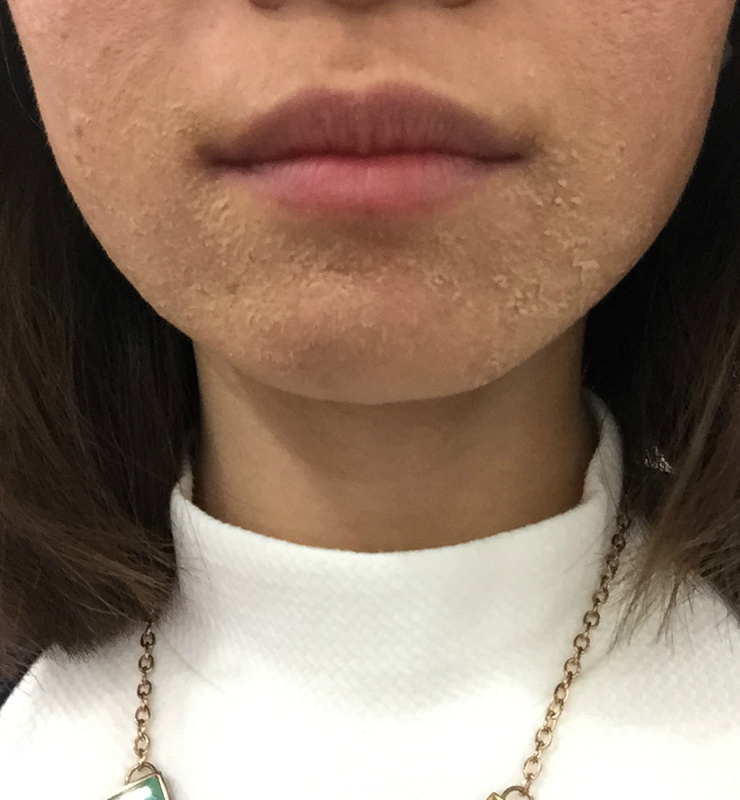
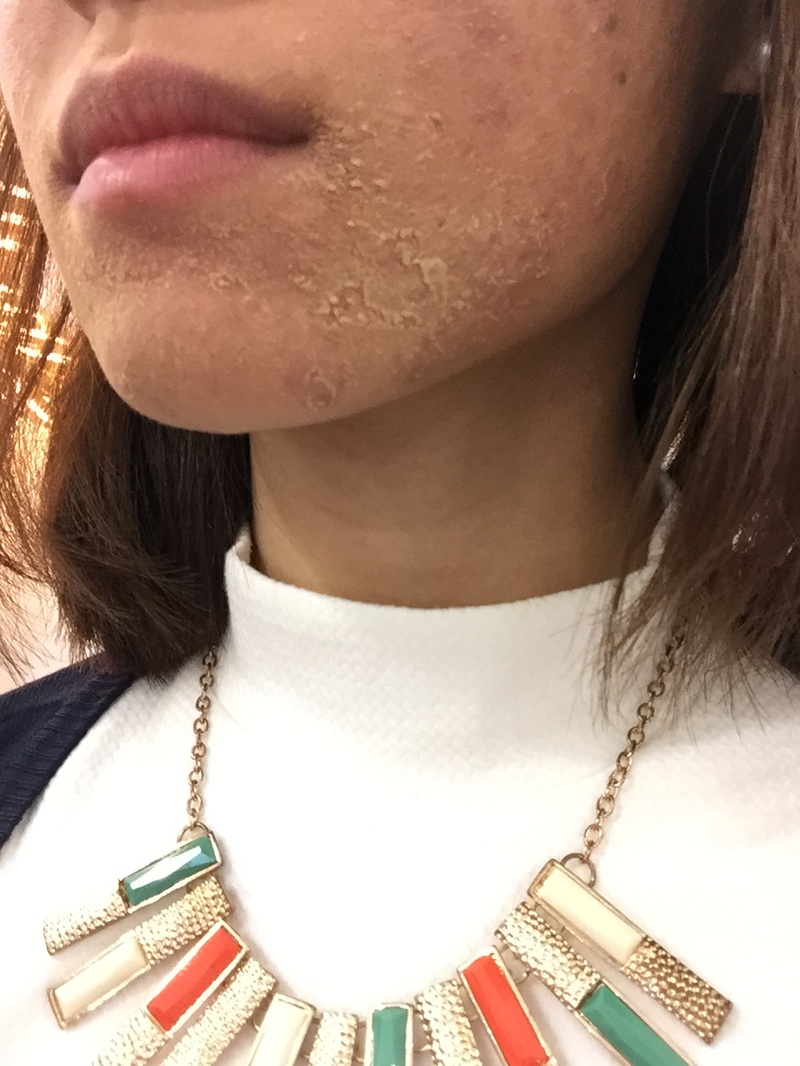
Dry, sensitive and acne-prone skin is the bane of my life as at this point. It frustrates me in applying makeup over dry and rough skin patches especially when I have important meetings or events to attend ): Just imagine you have a meeting and your colleagues/clients are somewhat distracted by that flaky piece of skin dangling near your lips, yet you thought they are admiring your beautiful lips? Lol.
Sigh, I continued to experience severe dry and flaky skin around my lips and chin region, which I attributed the dryness to the topical acne medications. I'm quite a "GEY KHIANG" person, so for facial products such as acne creams, I will spam the products machiam like it's free. :/ Yes, I know I only have myself to blame for these unsightly dryness. I've learnt my lesson and as a result, I've reduced the dosage.
Aside from peeling, despite having minor acne outbreaks on my cheeks and forehead area, I noticed that they healed fairly quick. Acne wasn't as full blown and brutal as my pre-acne treatment condition due to the success of AGNES Acne Treatment, and I was due to return for the second session in late July.
25th June (2nd Q-switch)
Dr. Gerard increased the intensity of the laser this time round, and soothing mask was not required since my skin got conditioned to the laser after my virgin Q-switch laser treatment.
Dr. Gerard increased the intensity of the laser this time round, and soothing mask was not required since my skin got conditioned to the laser after my virgin Q-switch laser treatment.
Recovery after 2nd Q-switch laser (26th June - 7th July)
I had acne bumps which erupted mostly on my right cheek and jawline during this period. I guessed occasional late nights and stress over work stuff contributed to the acne outbreak as well. ):
I had acne bumps which erupted mostly on my right cheek and jawline during this period. I guessed occasional late nights and stress over work stuff contributed to the acne outbreak as well. ):

8th July (3rd Q-switch)
To promote a deeper skin rejuvenation and to reduce my skin redness, Dr. Gerard increased the laser intensity again for this round, and the intensity was maintained for subsequent laser sessions.
To promote a deeper skin rejuvenation and to reduce my skin redness, Dr. Gerard increased the laser intensity again for this round, and the intensity was maintained for subsequent laser sessions.
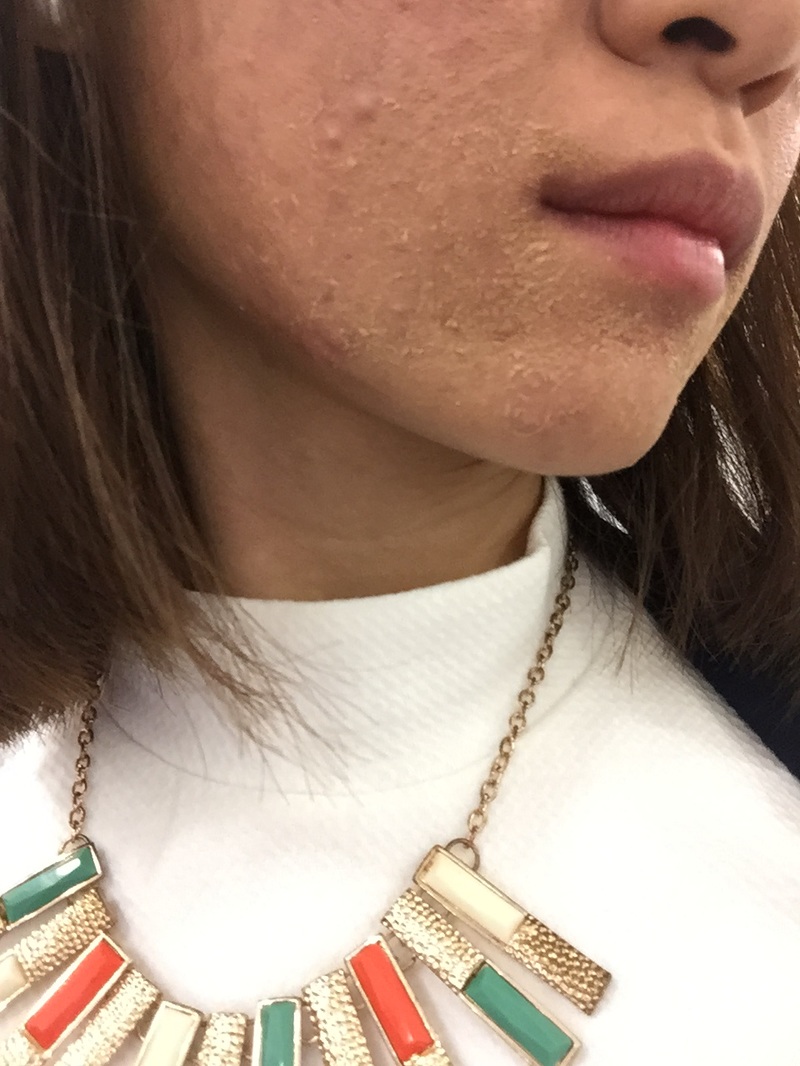
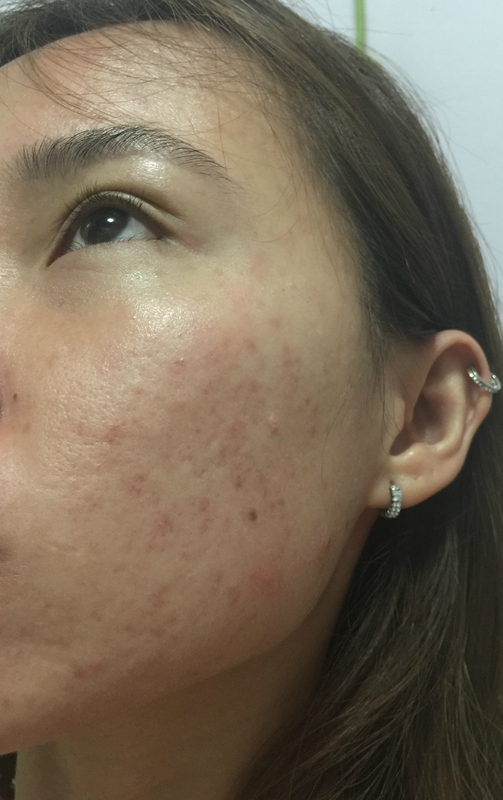
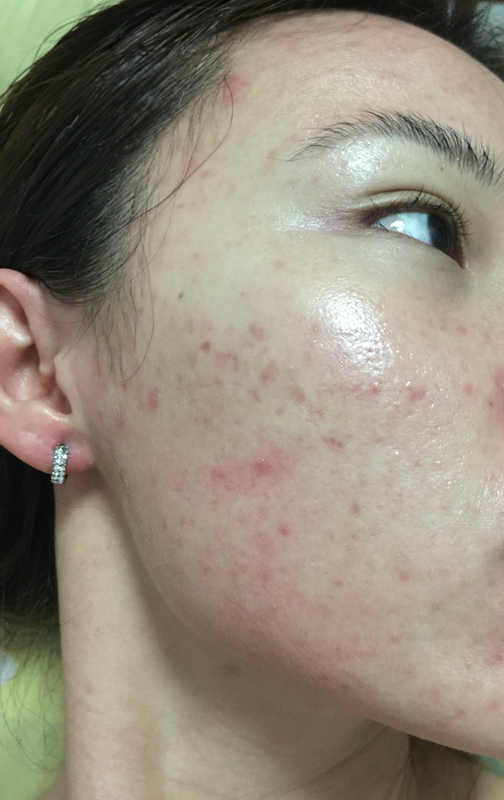
Recovery after 3rd Q-switch laser (9th July - 22th July)
Notice the improvement in my skin clarity and texture!
Notice the improvement in my skin clarity and texture!
After my 3rd Q-switch laser session, Dr. Gerard advised me to proceed with the 2nd AGNES Acne Treatment two weeks later. I was very pleased with the results following my 1st AGNES Acne Treatment, so proceeding with 2nd AGNES Acne Treatment will naturally mean one step closer to achieving acne-free skin!
Downtime for AGNES is roughly 3 days, so the best time to go for this treatment will be on a Friday evening after work, returning on a Saturday for Radio Frequency. That should leave you another 1.5 days to recuperate before returning to work on a Monday.
I will not further elaborate on the procedure of AGNES Acne Treatment since I've already covered it in my previous post. So I'll let the photos do the talking!
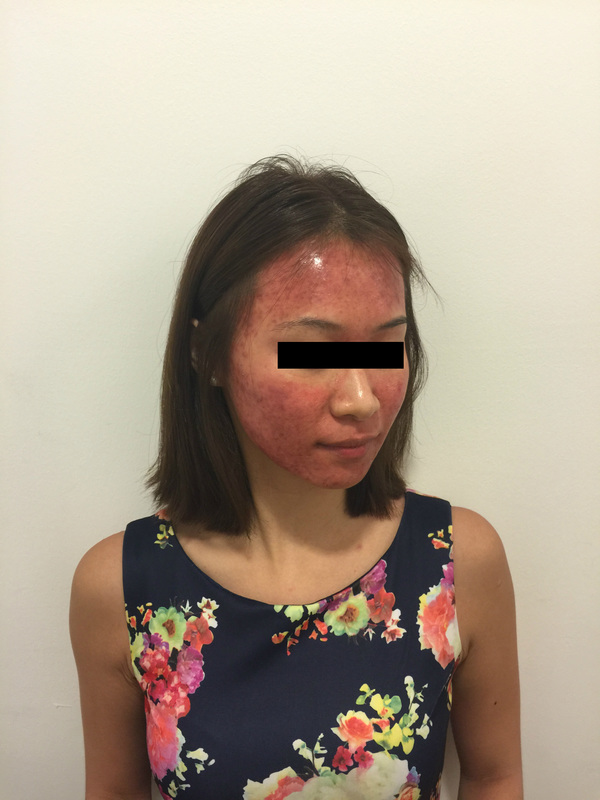
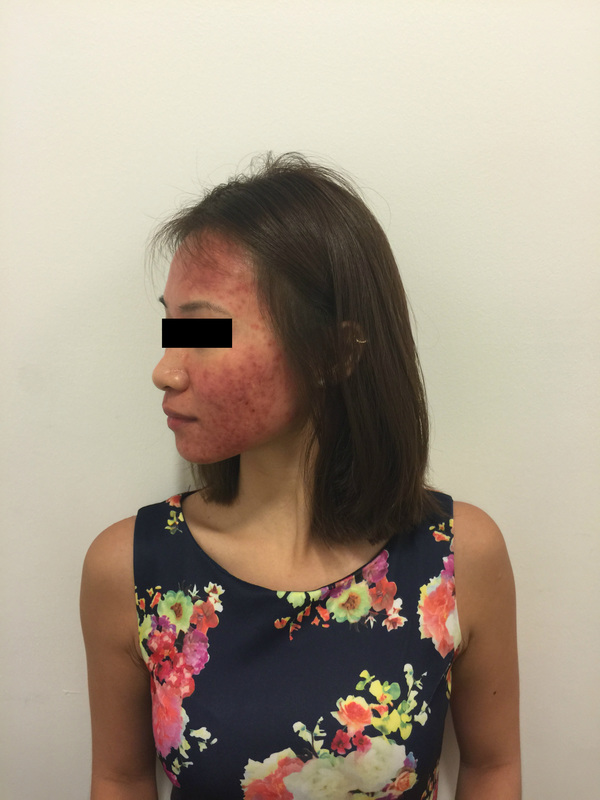
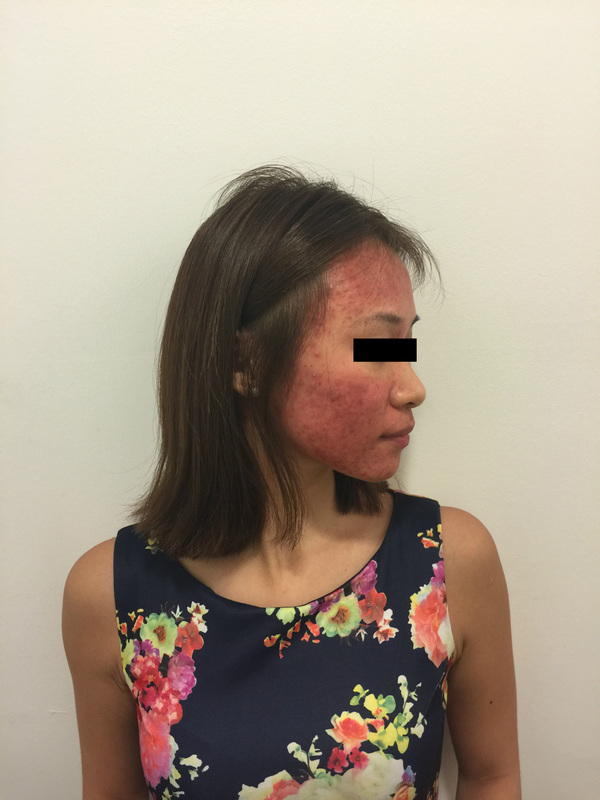
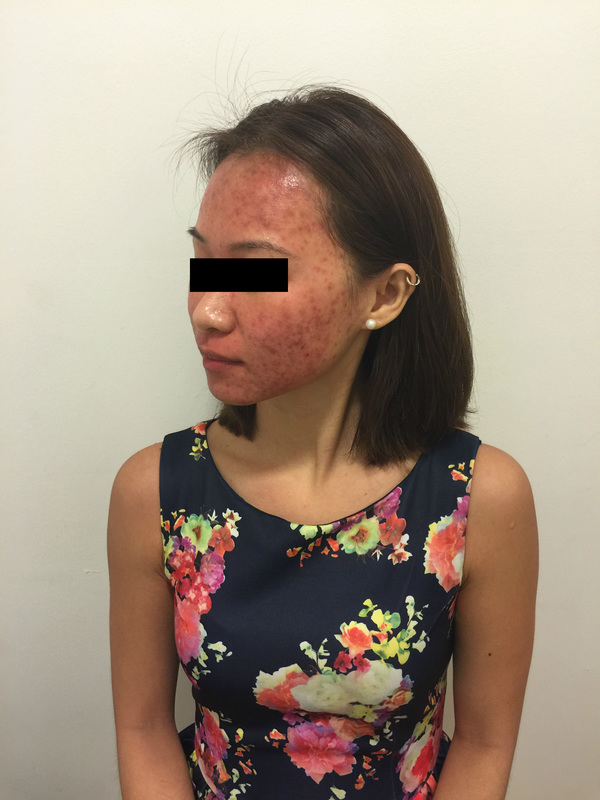
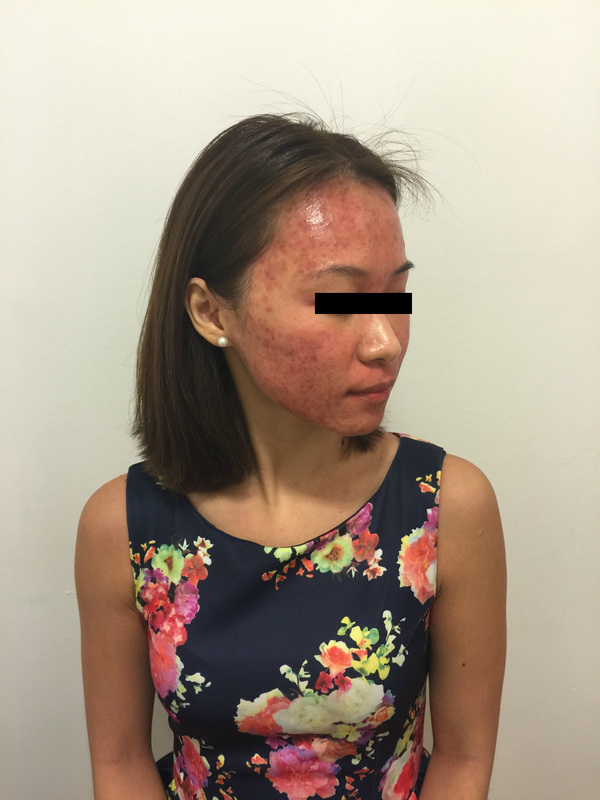
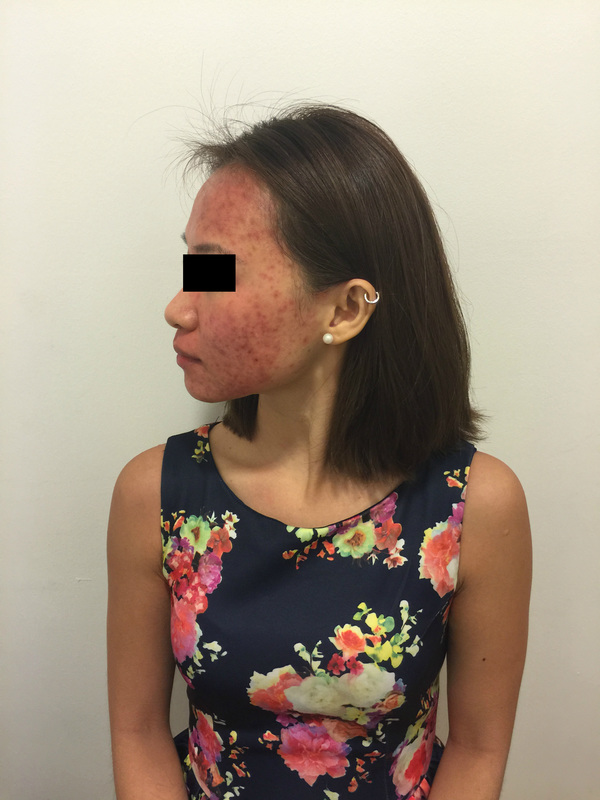
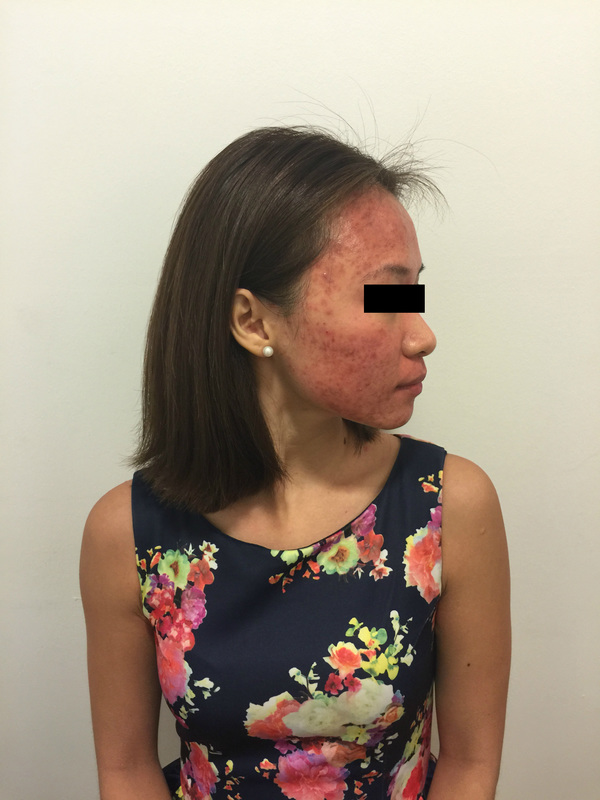
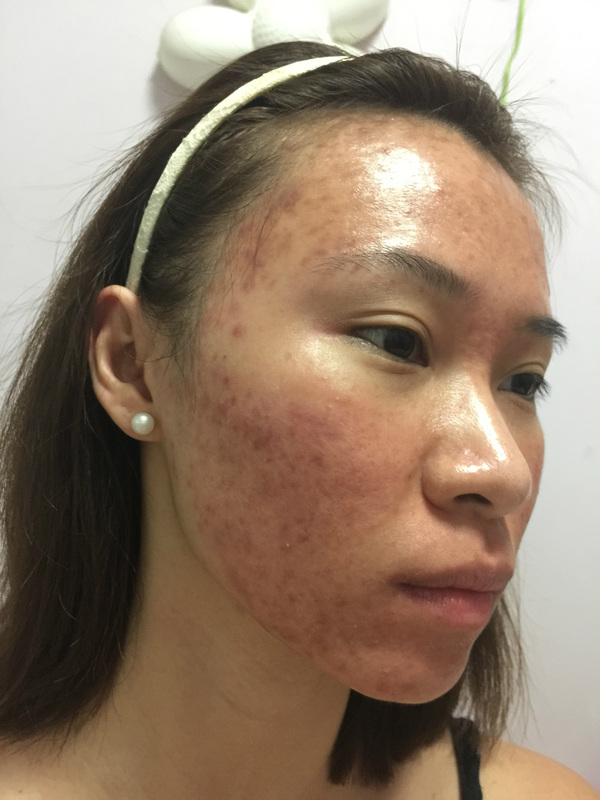
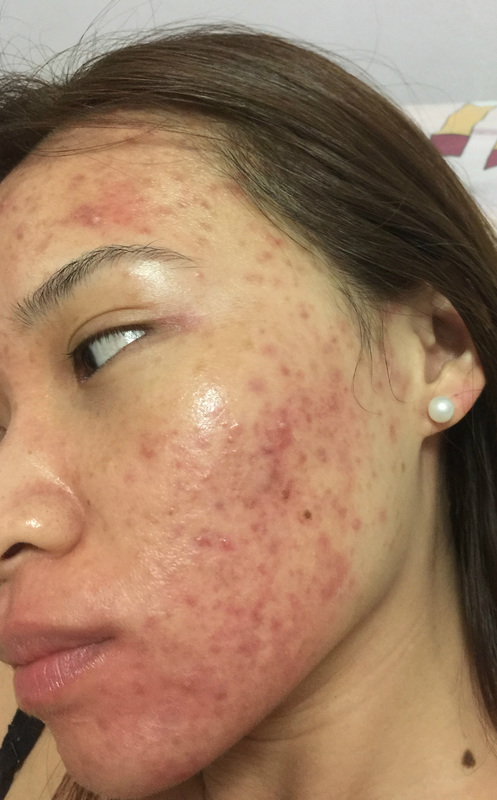
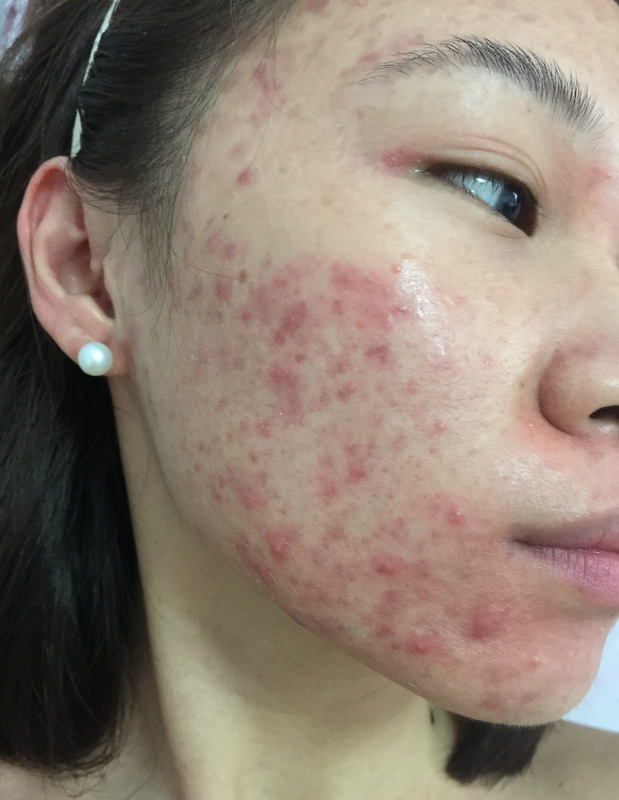
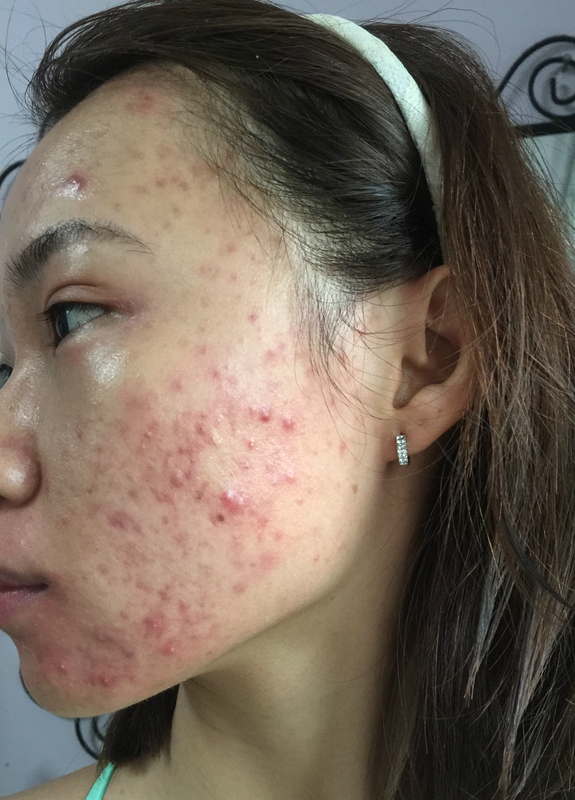
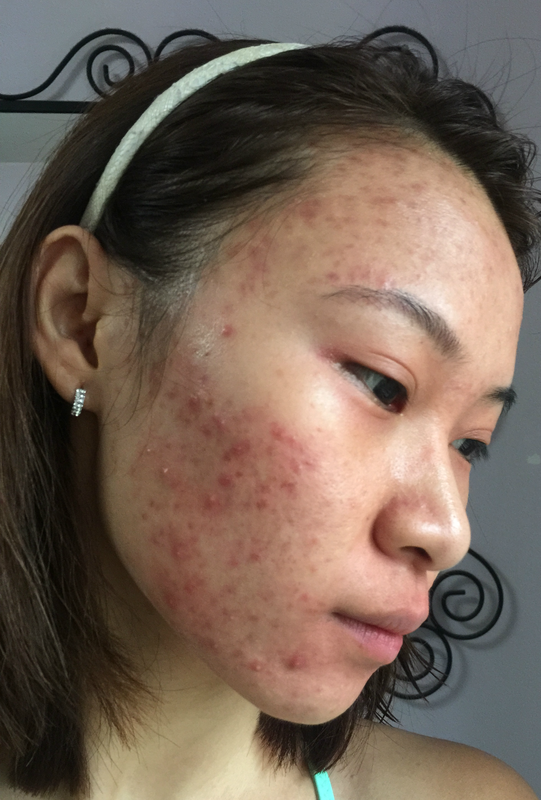
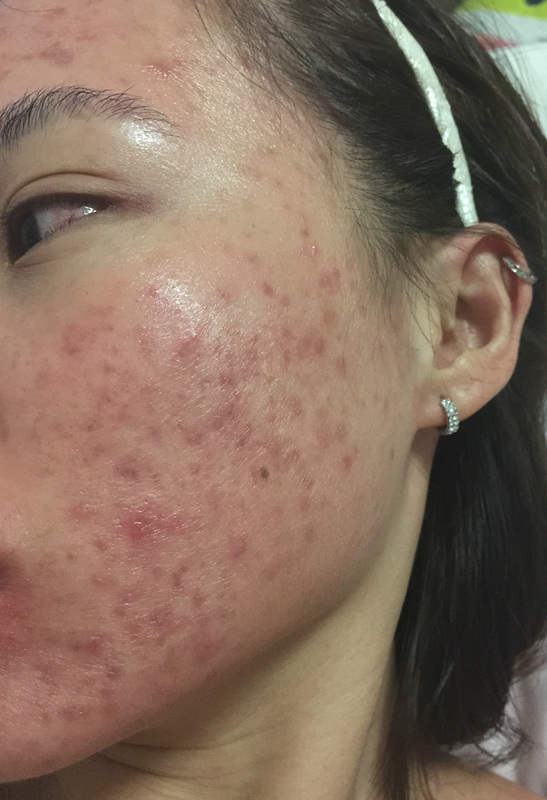
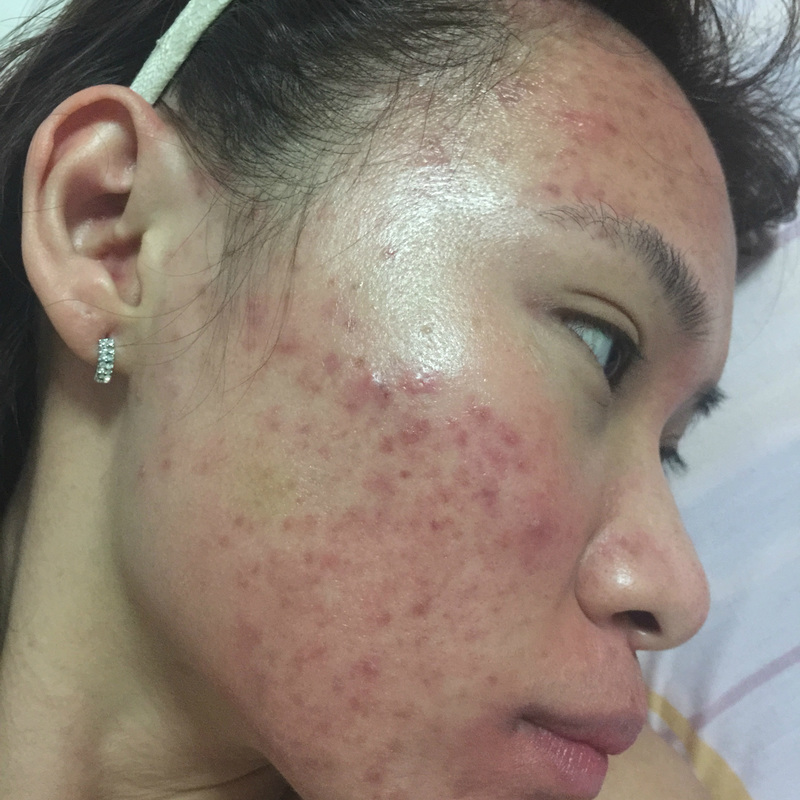
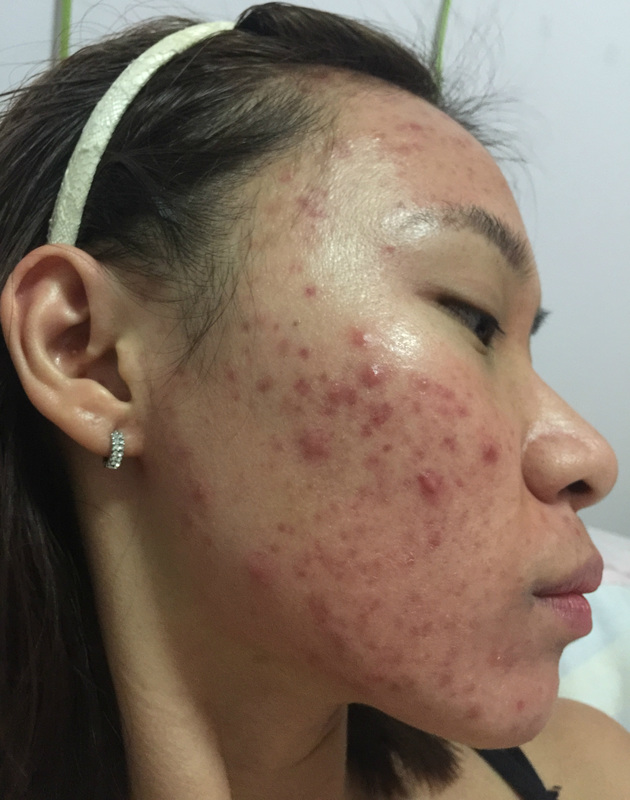
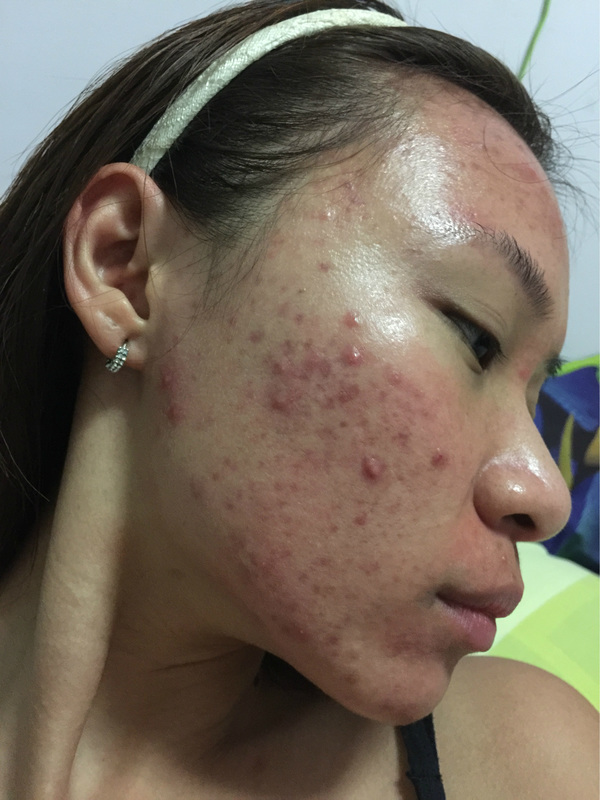
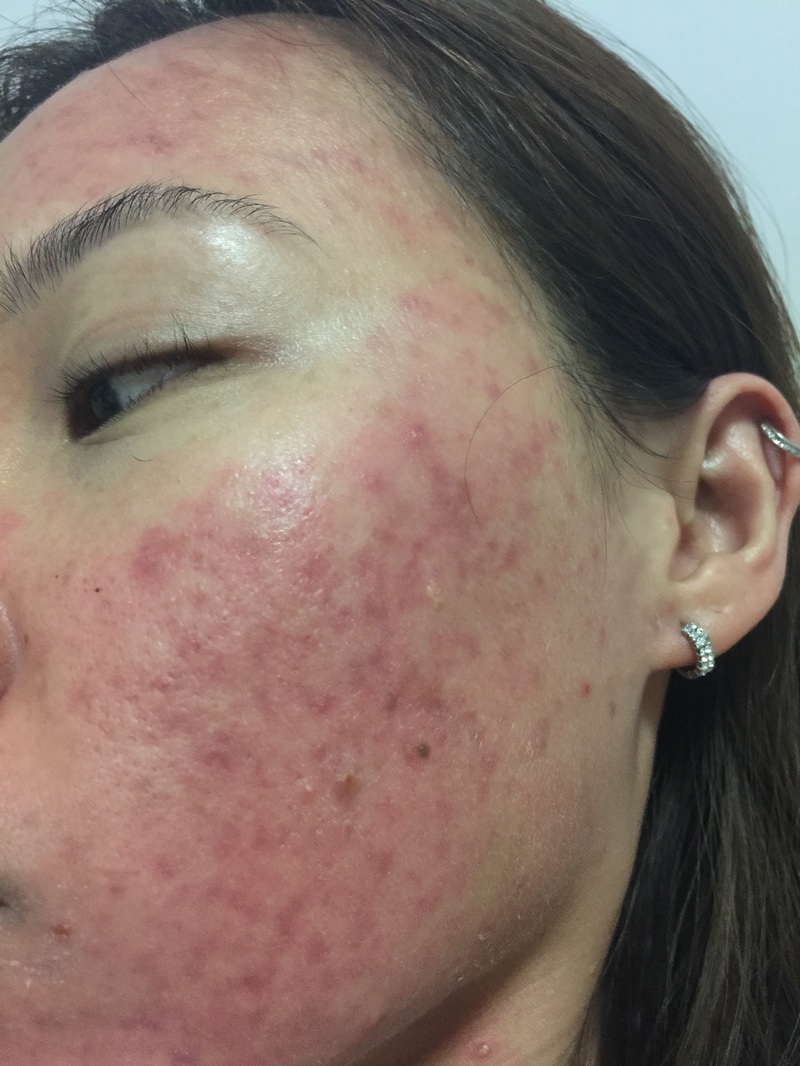
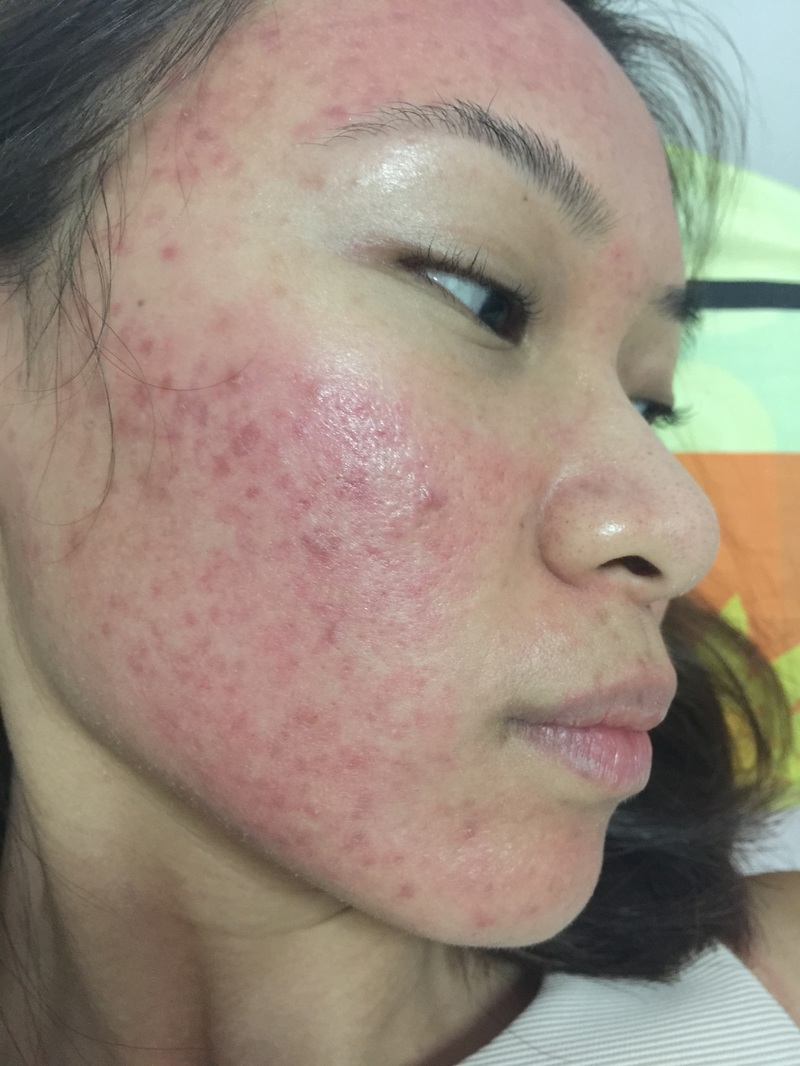
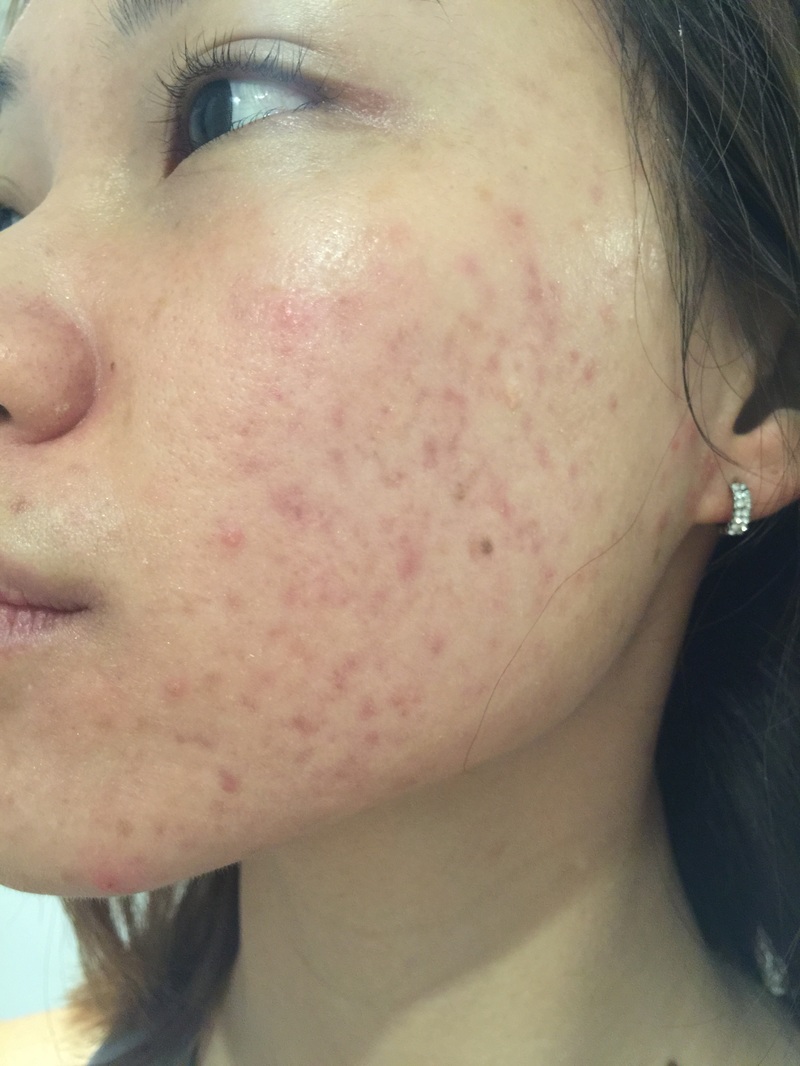
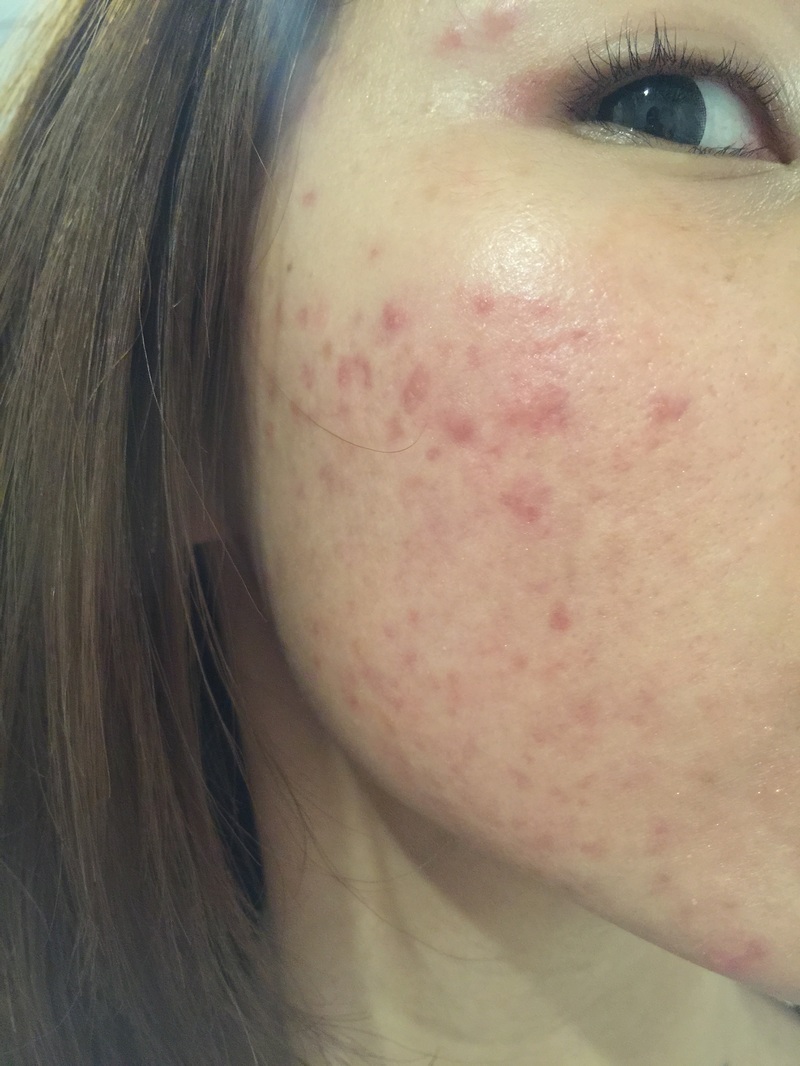
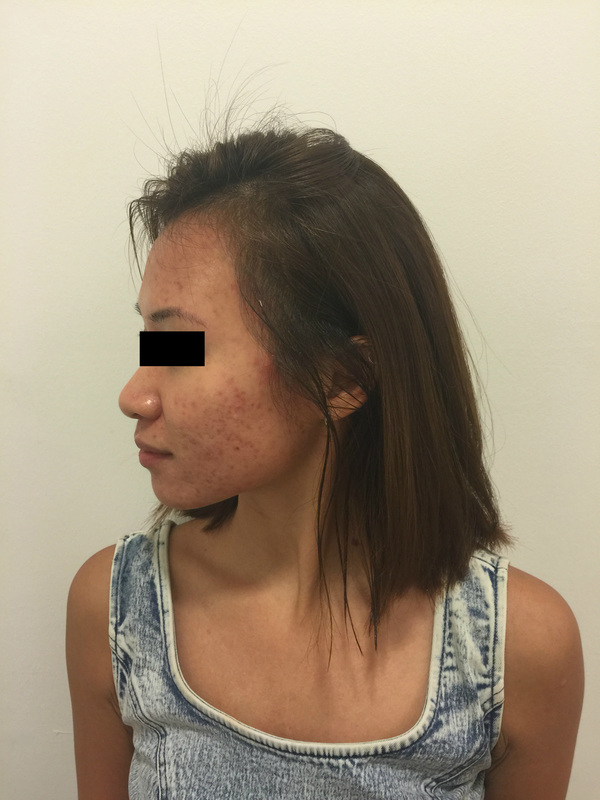
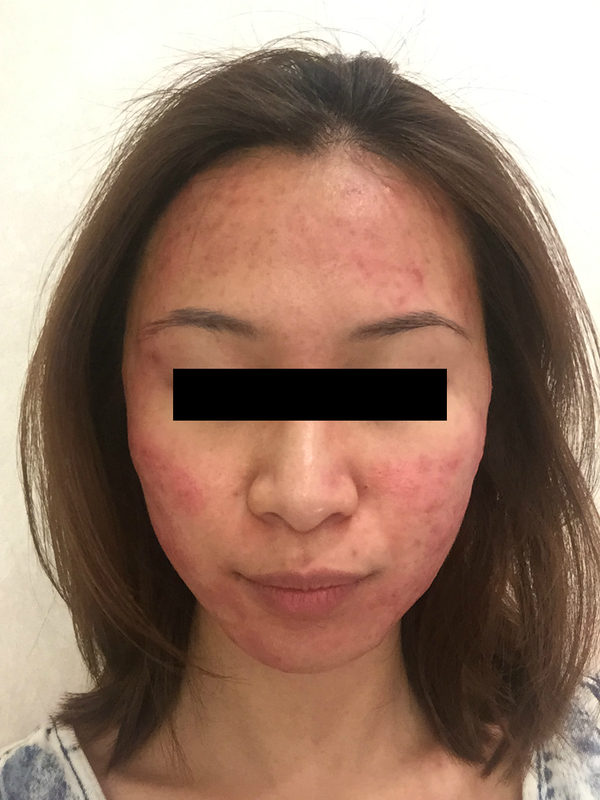
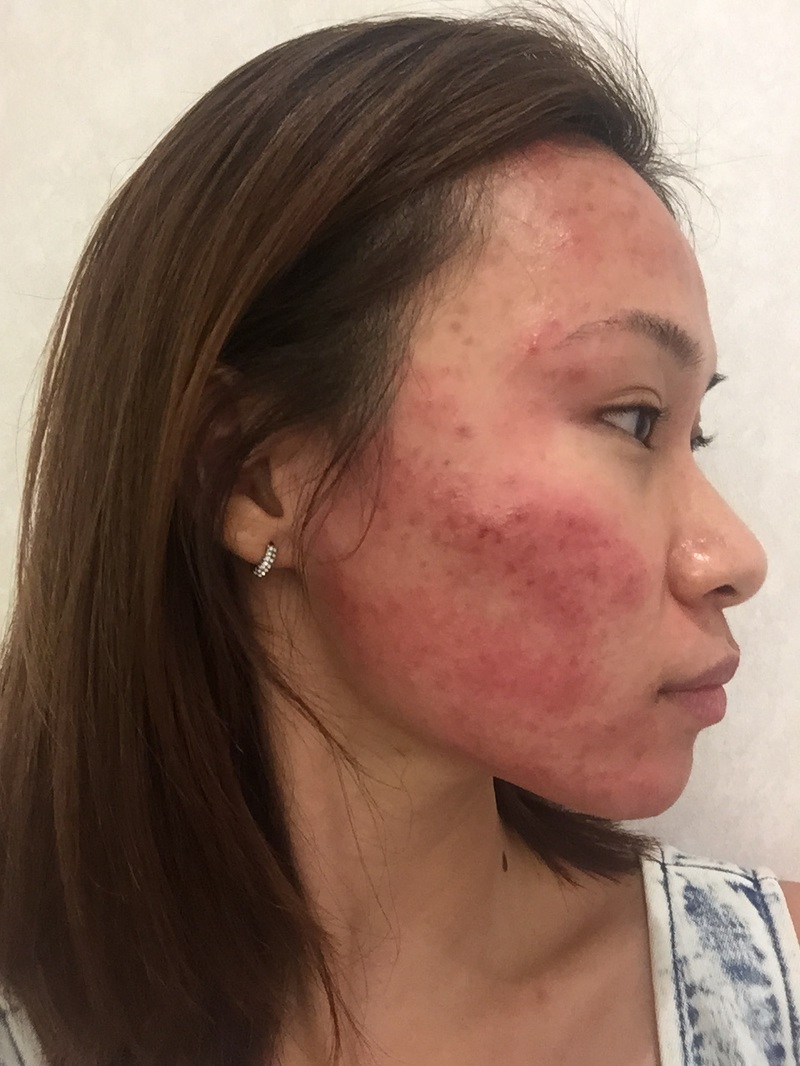
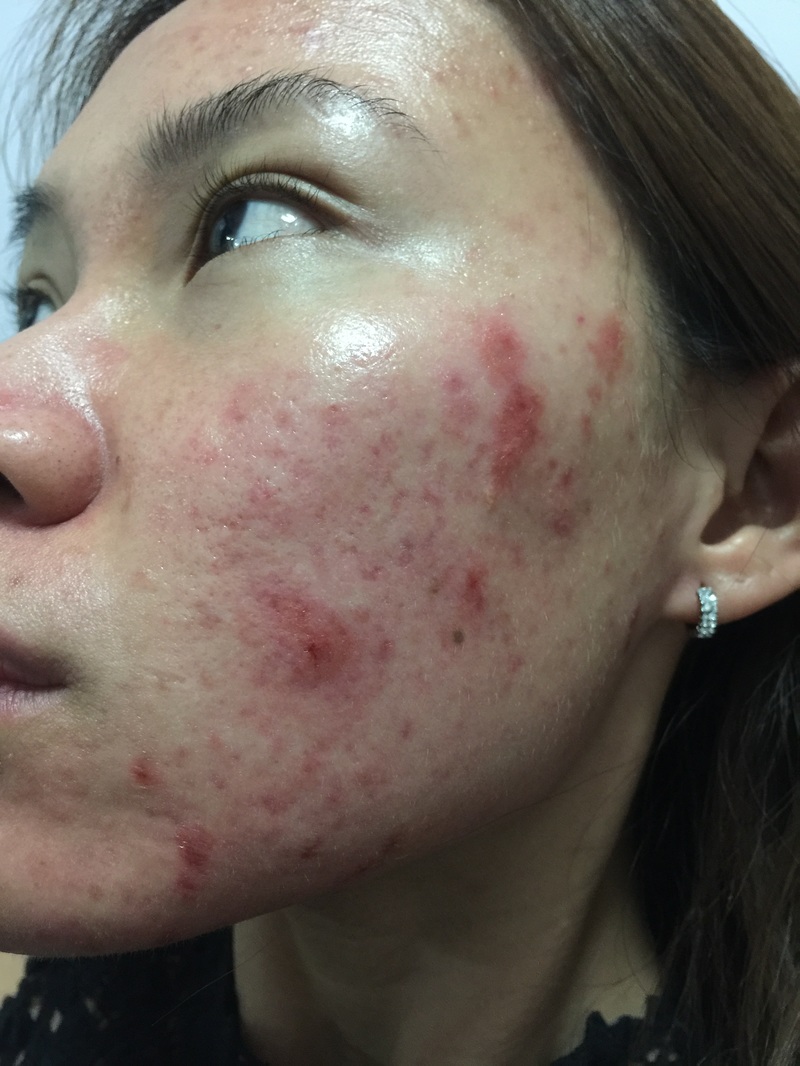
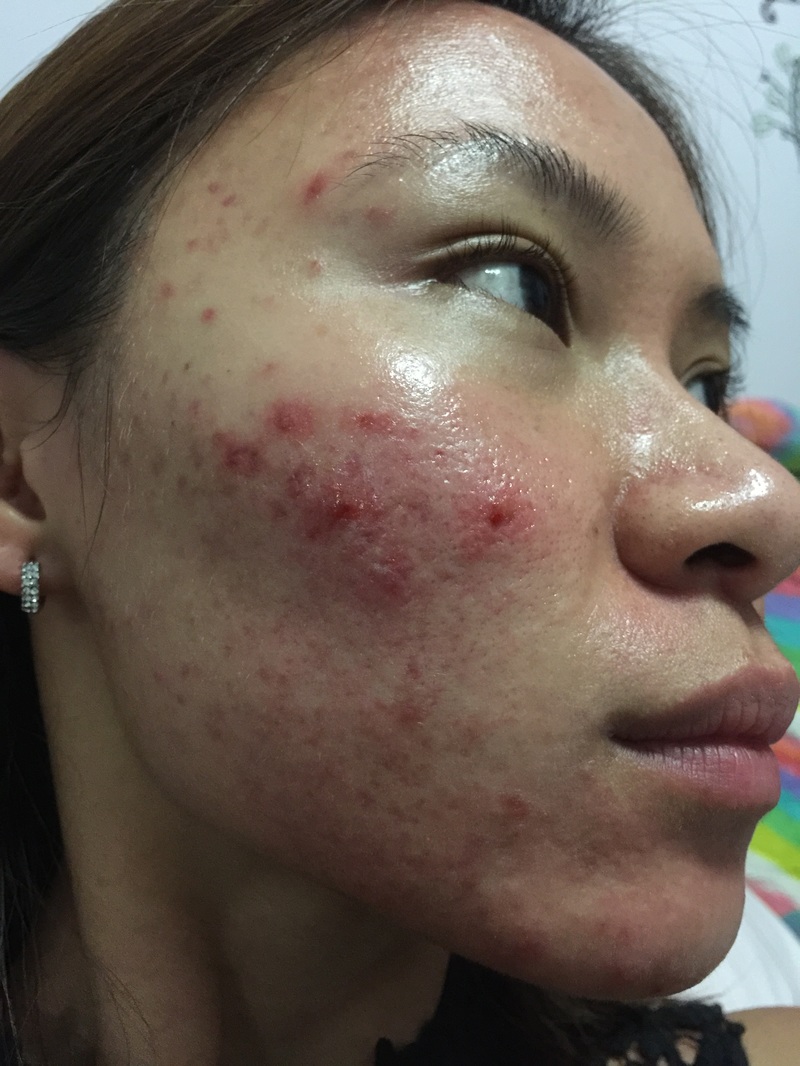
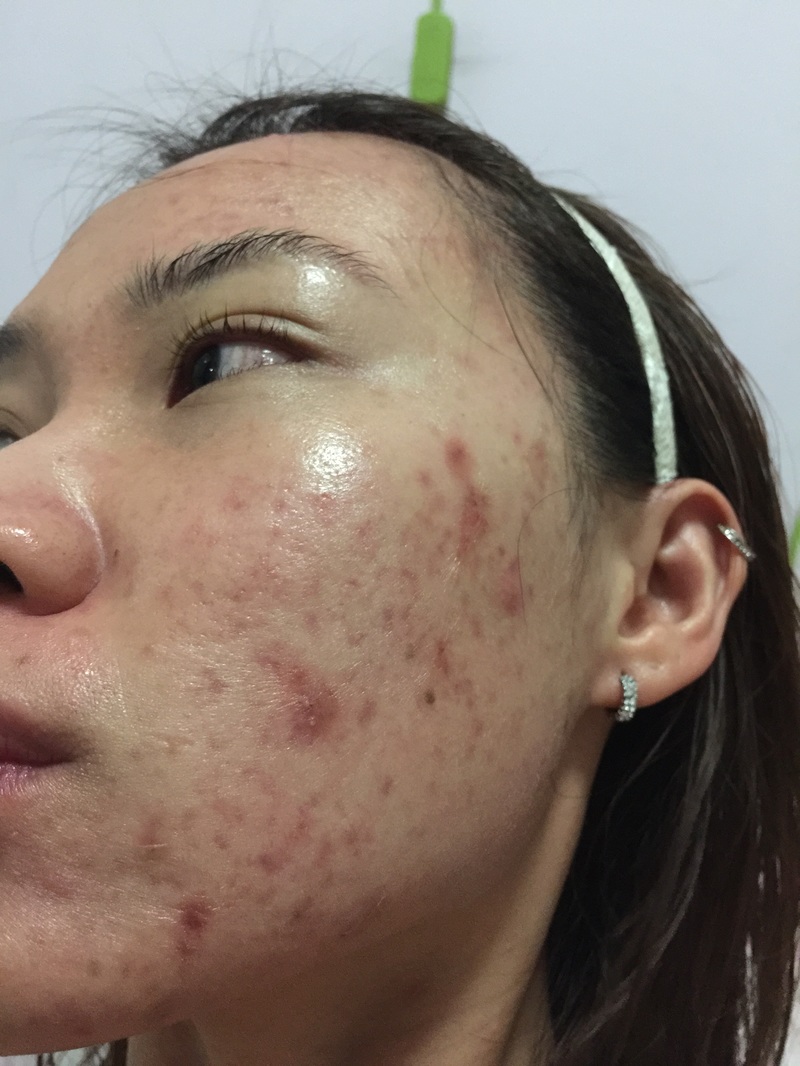
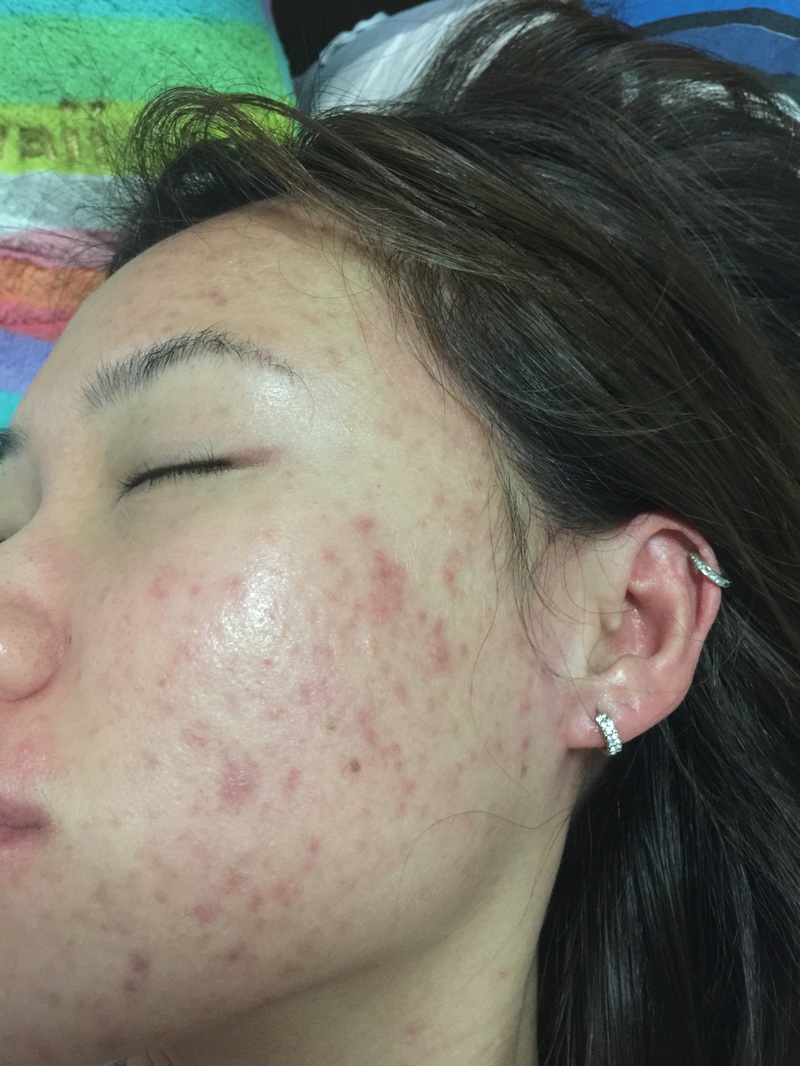
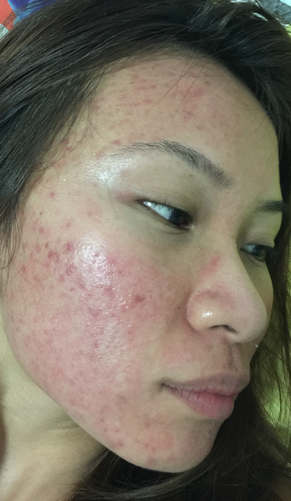
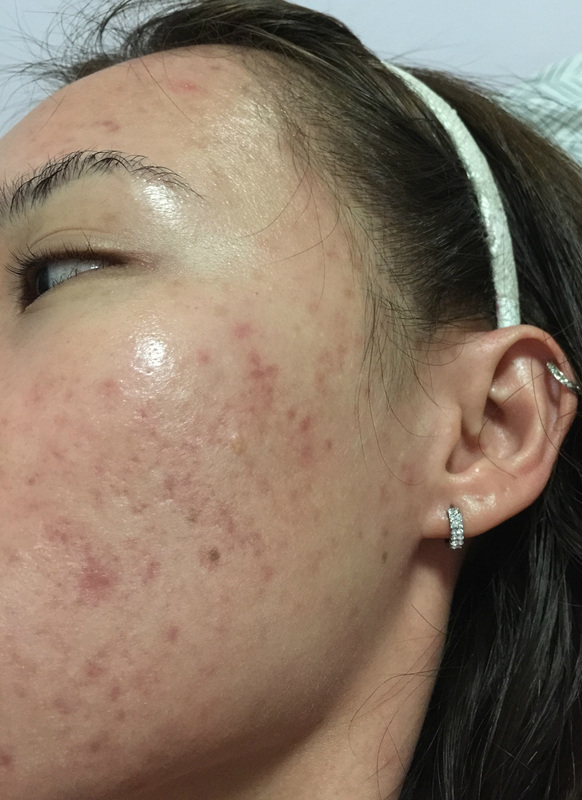
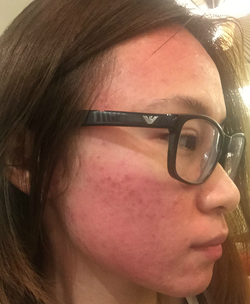
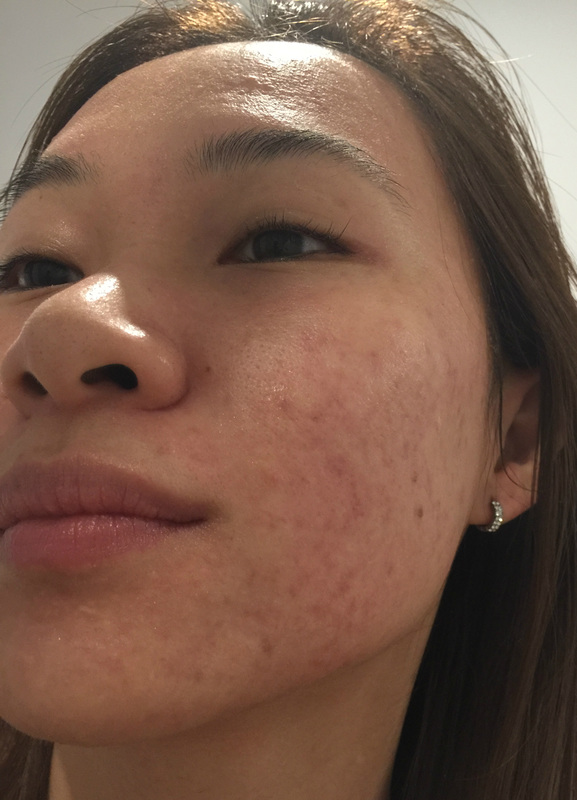
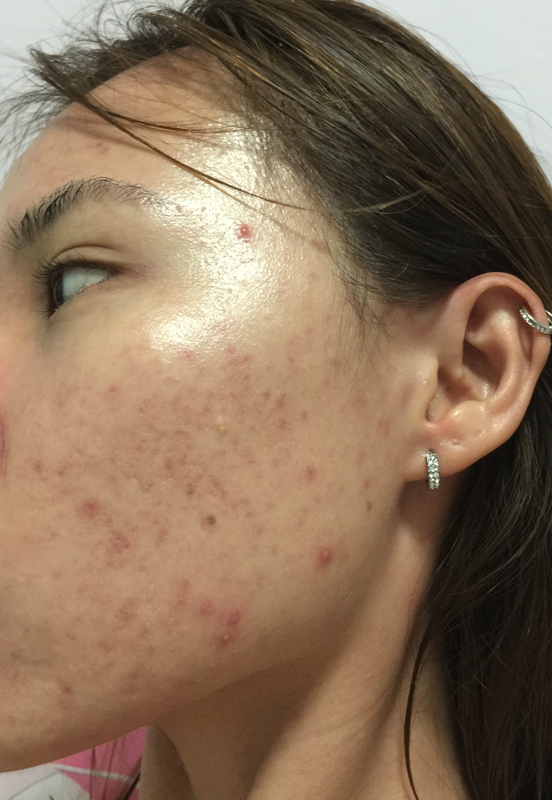
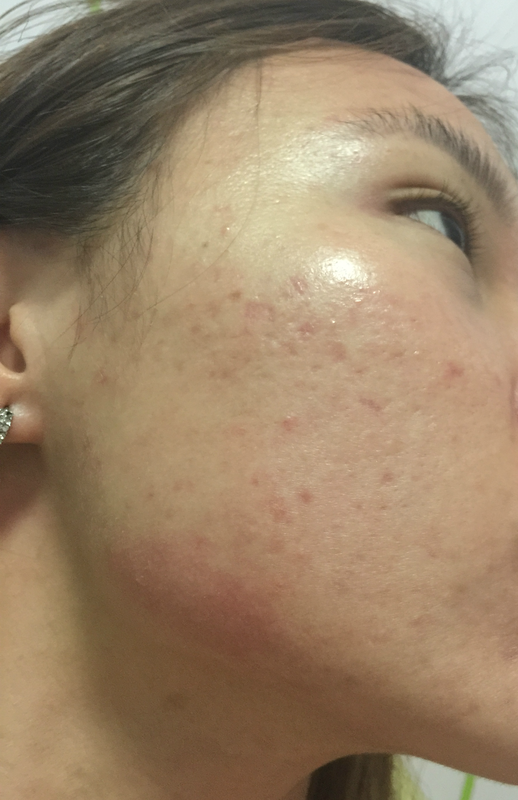
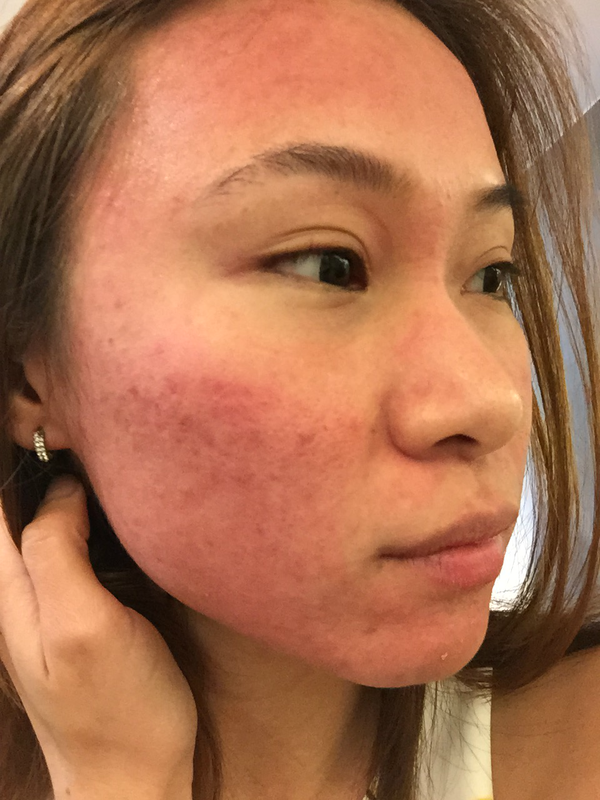
Pre-treatment photos taken on 23rd July 2015.
(Do note that I already went through 3 sessions of Q-switch laser treatments prior to my 2nd AGNES Acne Treatment.)
Downtime for AGNES is roughly 3 days, so the best time to go for this treatment will be on a Friday evening after work, returning on a Saturday for Radio Frequency. That should leave you another 1.5 days to recuperate before returning to work on a Monday.
I will not further elaborate on the procedure of AGNES Acne Treatment since I've already covered it in my previous post. So I'll let the photos do the talking!
Pre-treatment photos taken on 23rd July 2015.
(Do note that I already went through 3 sessions of Q-switch laser treatments prior to my 2nd AGNES Acne Treatment.)
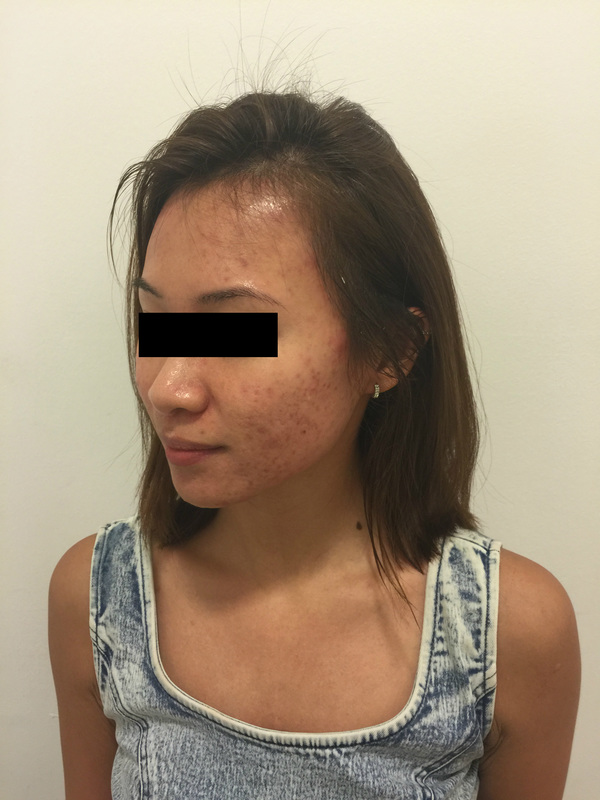
The time taken to perform a full face drainage with extraction for my 2nd AGNES Acne Treatment took less than 30 minutes (as compared to 1st treatment of 45 minutes) since acne has cleared for most part of my face. Happy news as it meant lesser pus, blackheads and acne to extract!
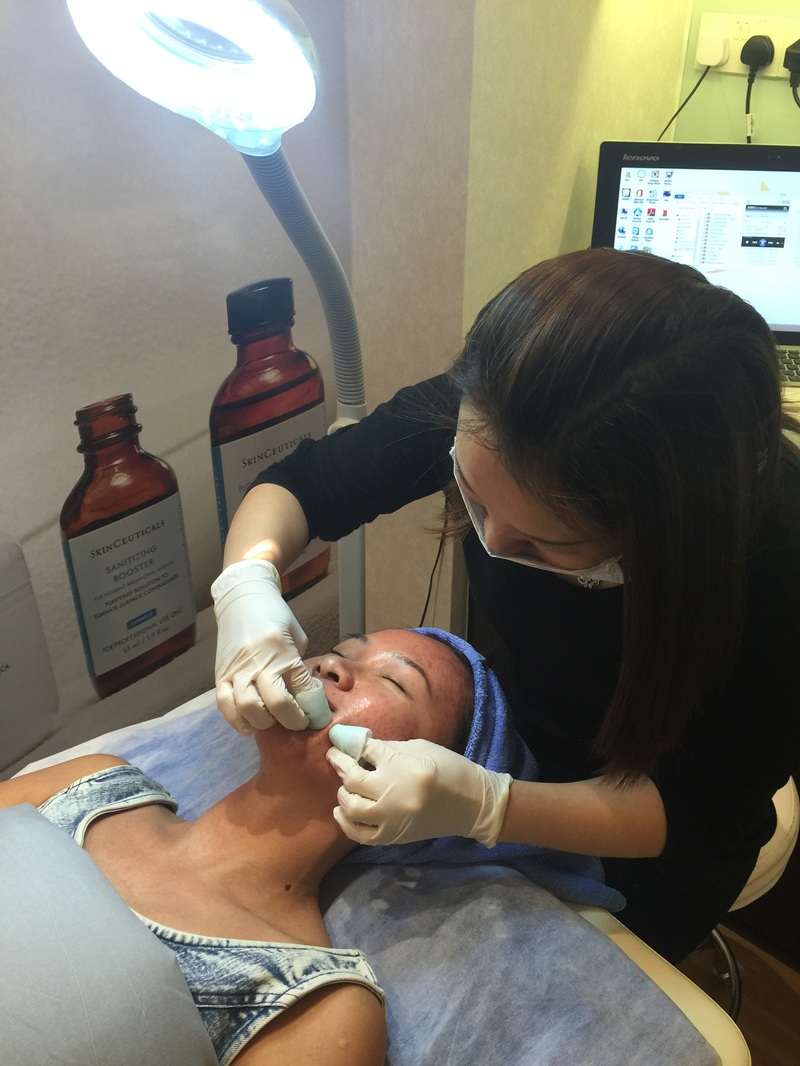
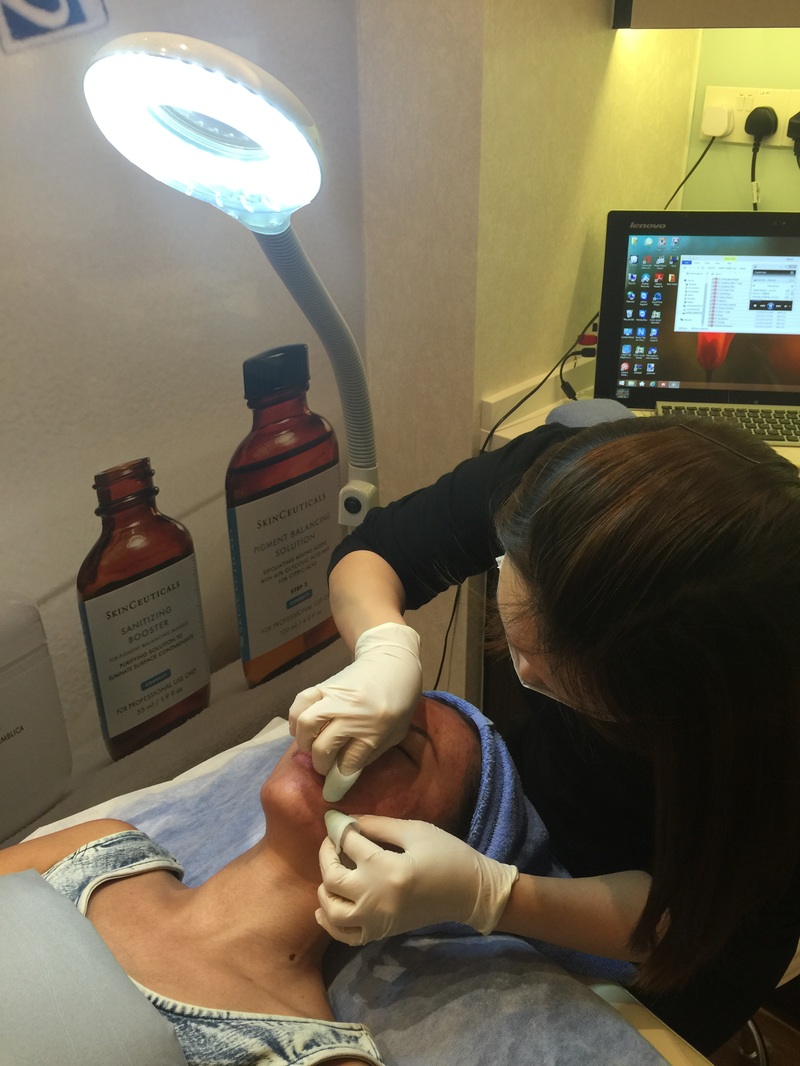
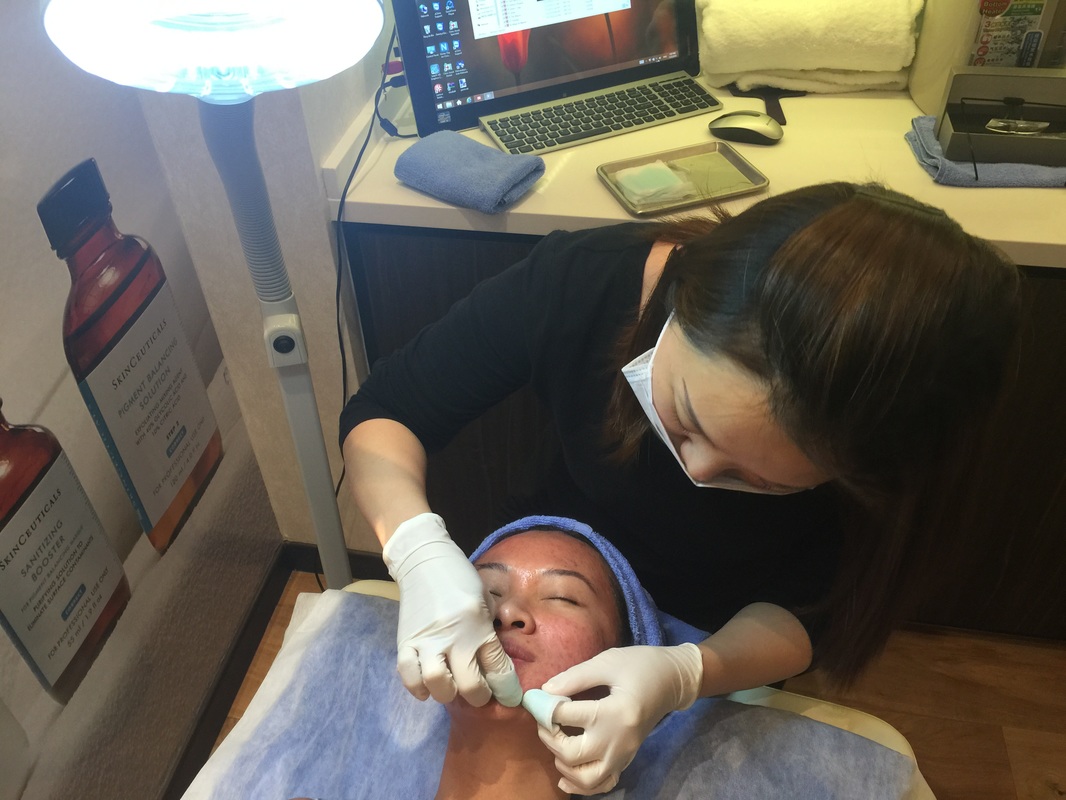
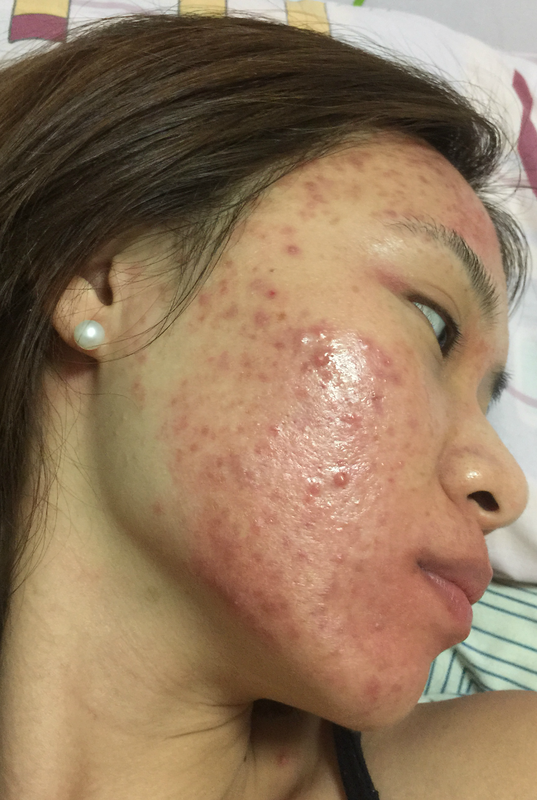
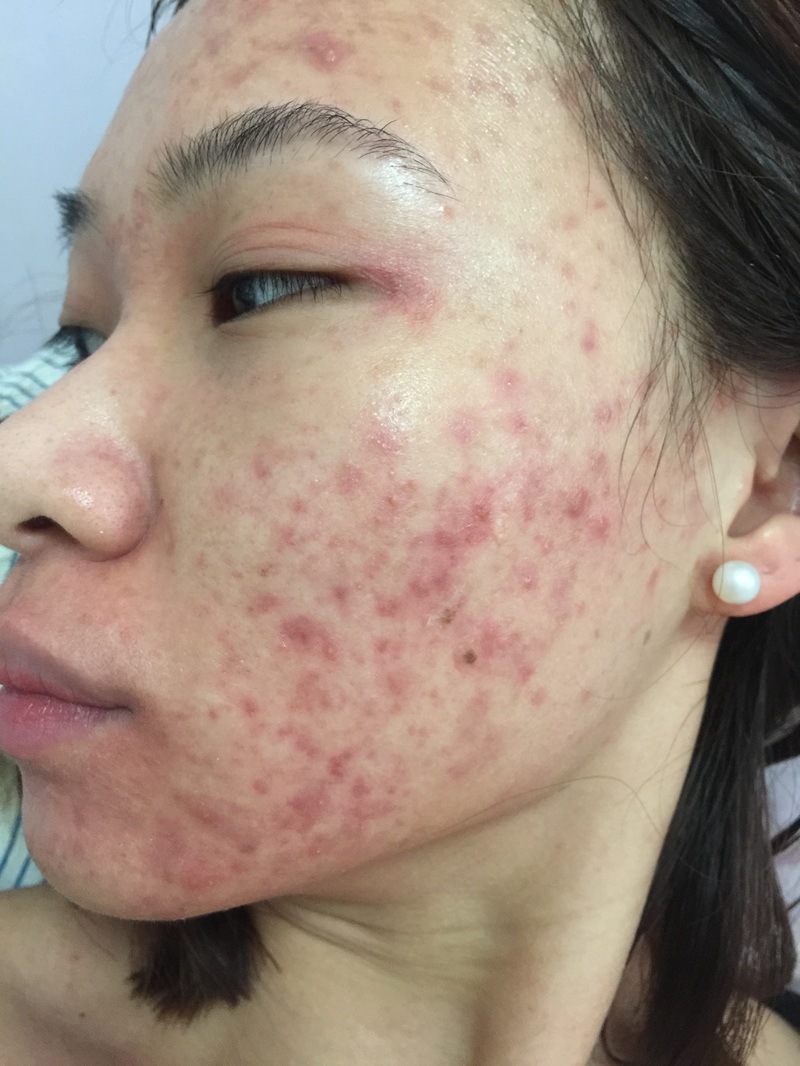
Following which, Dr. Gerard meticulously introduced 400 shots into my diseased pores. In contrast to my first AGNES Acne Treatment, my pain tolerance for this round was much lower than the former, despite having less affected areas.
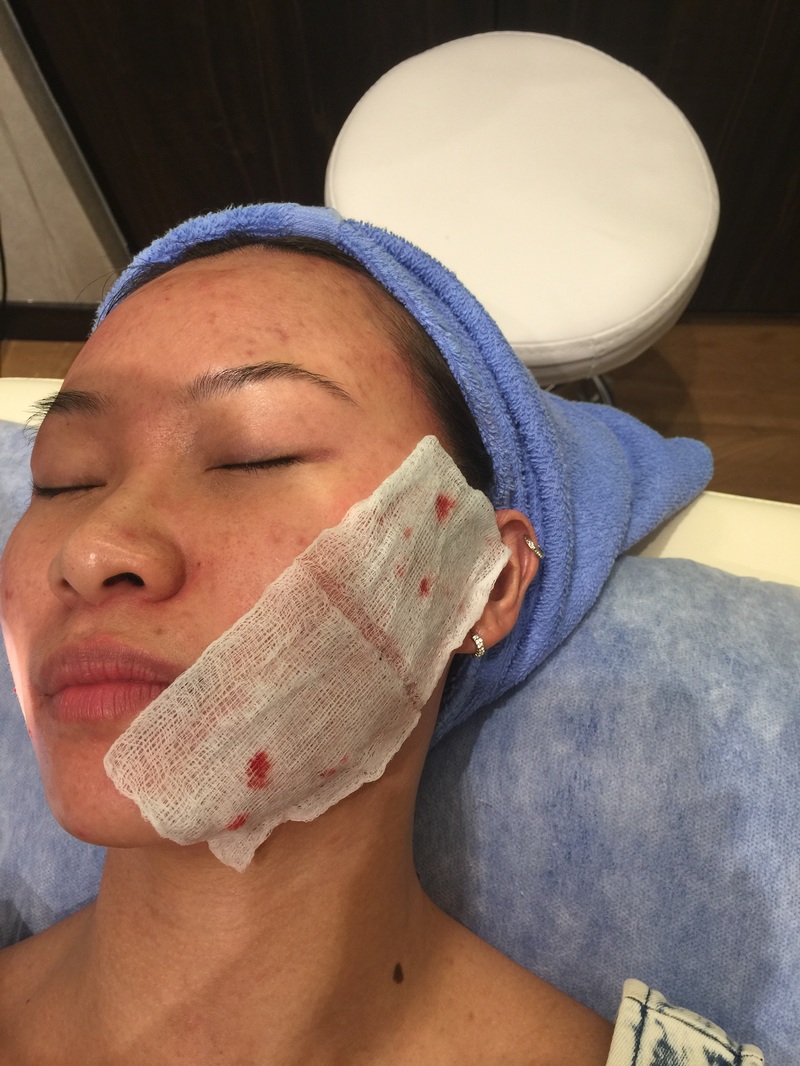
My face felt extremely raw and red following AGNES Acne Treatment. Dr. Gerard applied Foban cream to those treated skin regions to minimize inflammation.
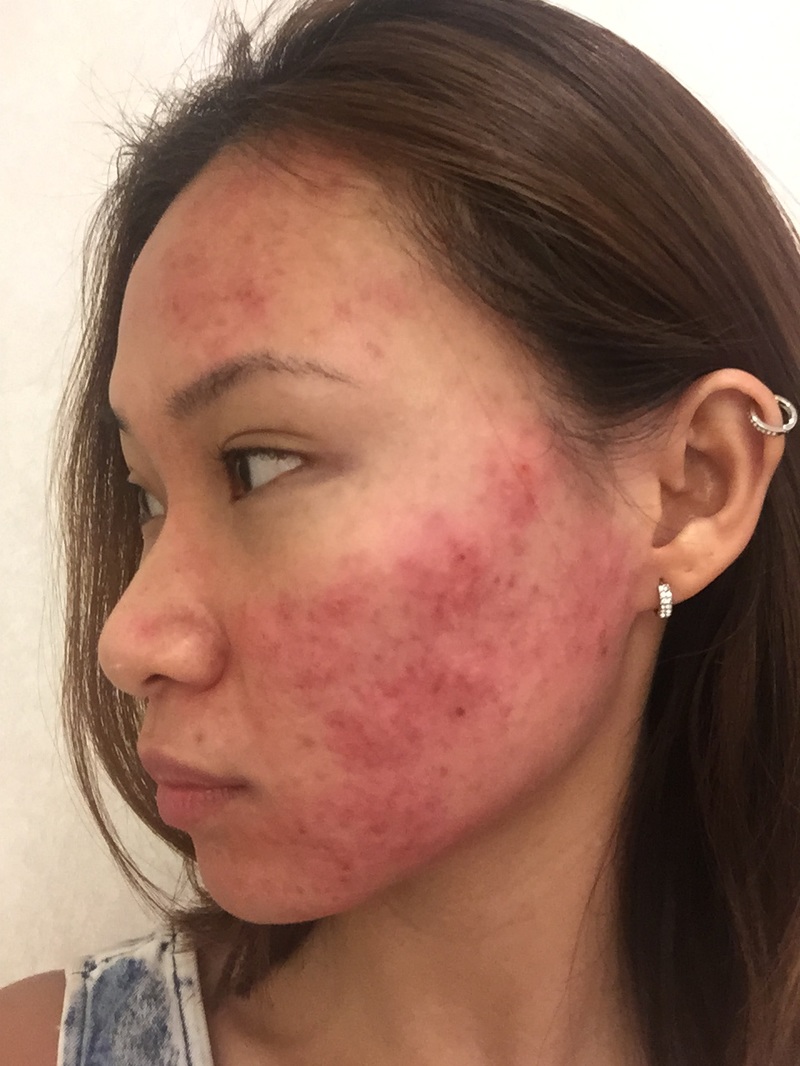
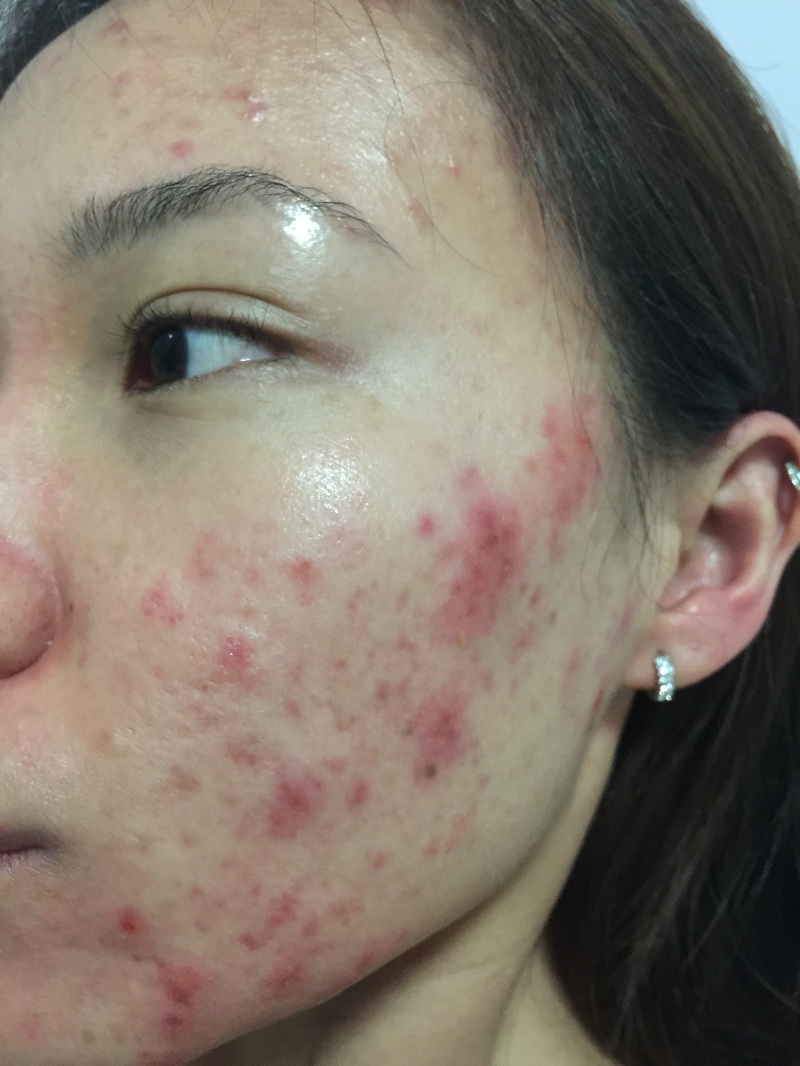
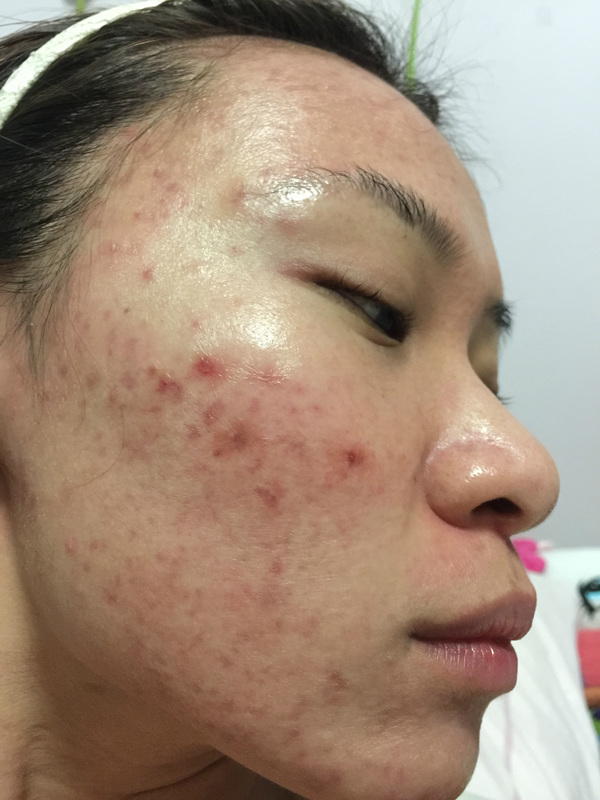
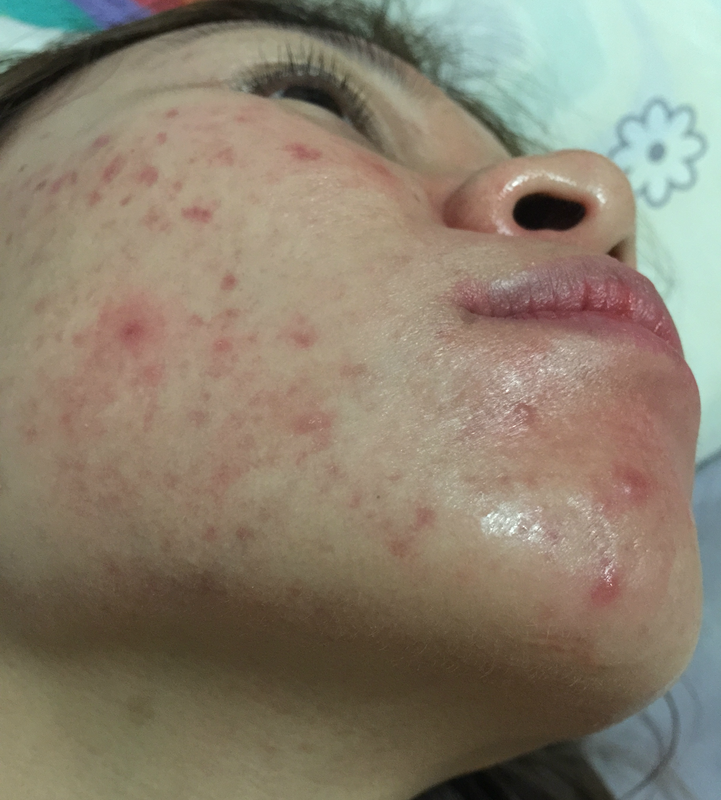
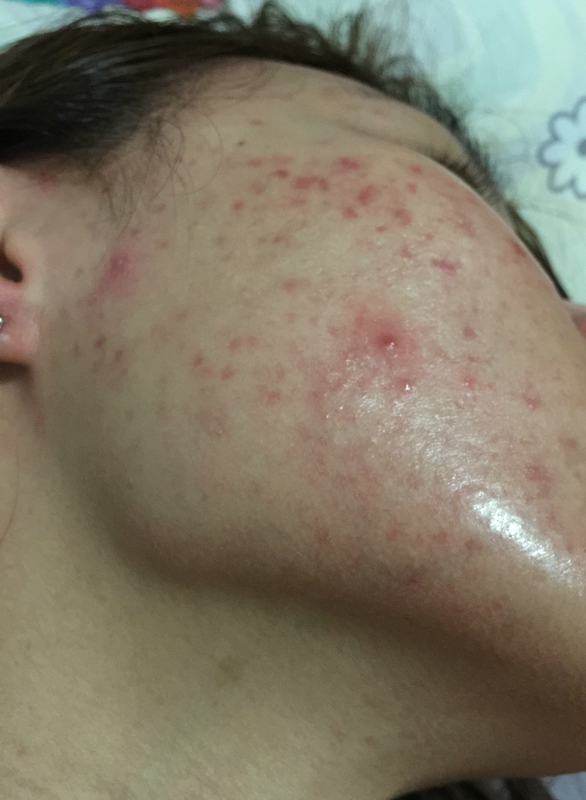
Close-up of both sides (Under home setting)
 |  |
24th July 2015
I returned to the clinic for Radio Frequency to clear off remaining debris from the initial treatment.
I returned to the clinic for Radio Frequency to clear off remaining debris from the initial treatment.

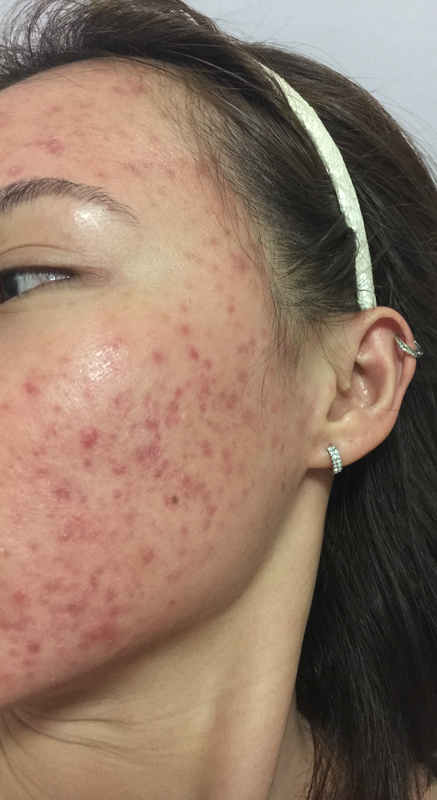
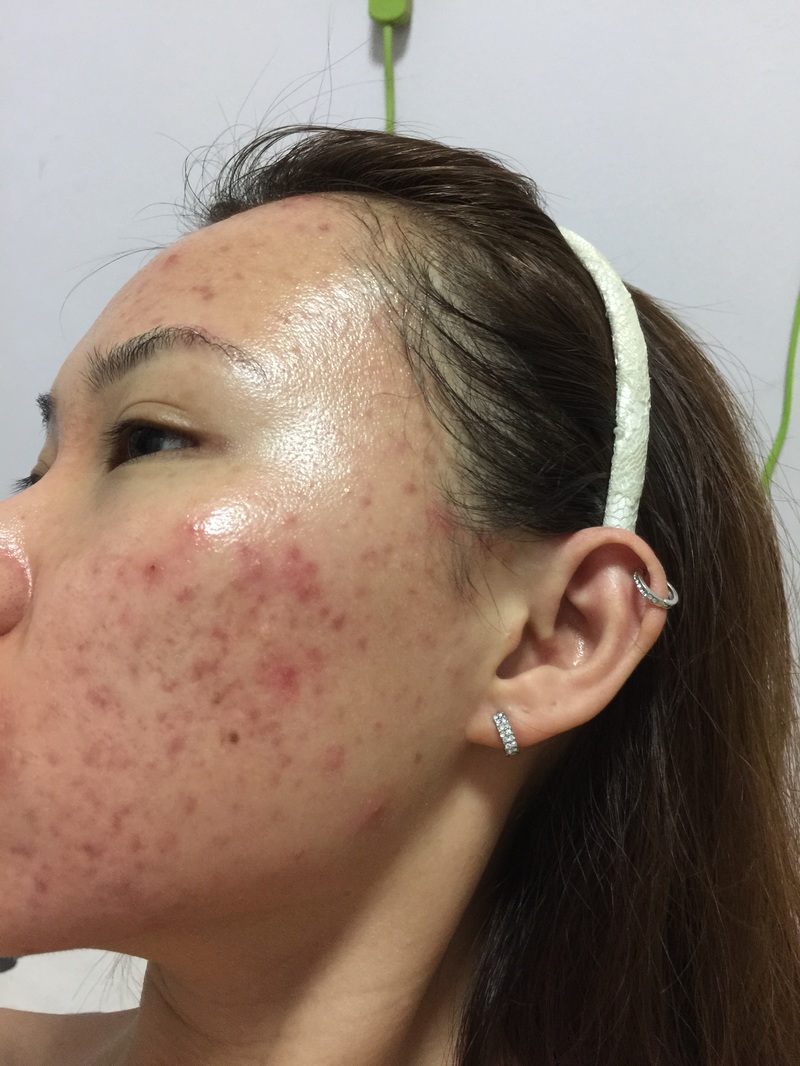
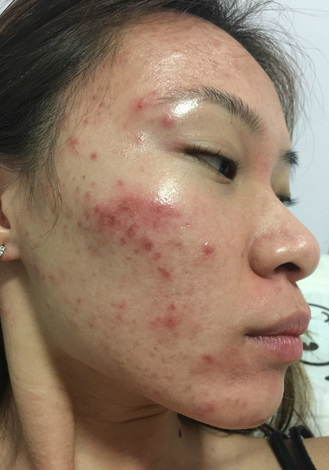
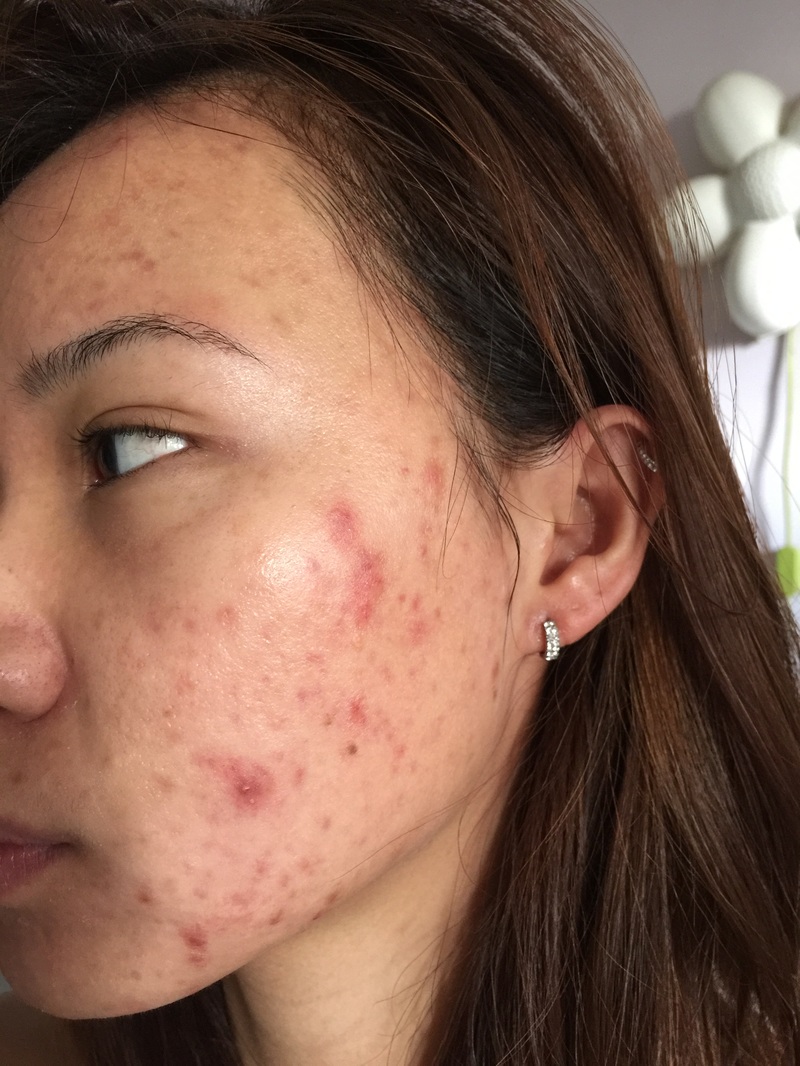
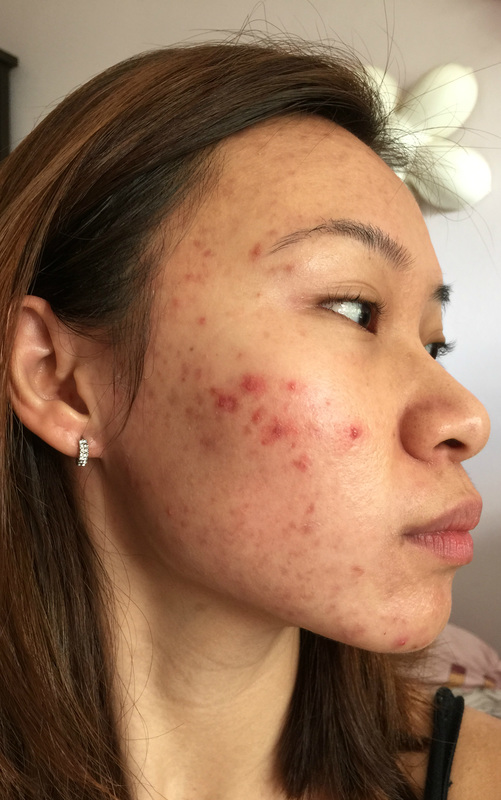
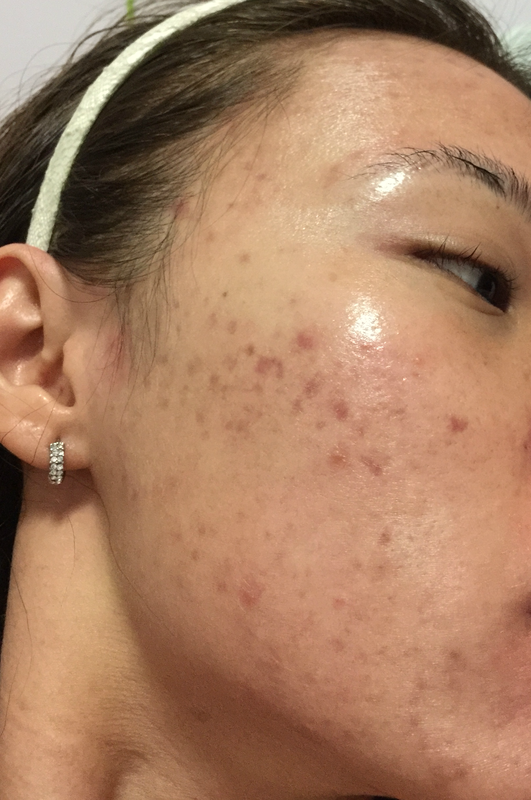
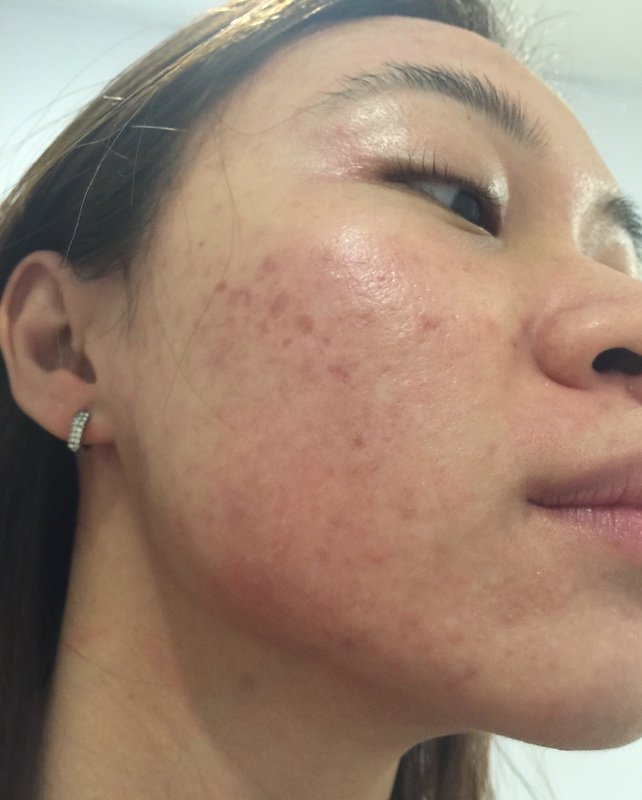
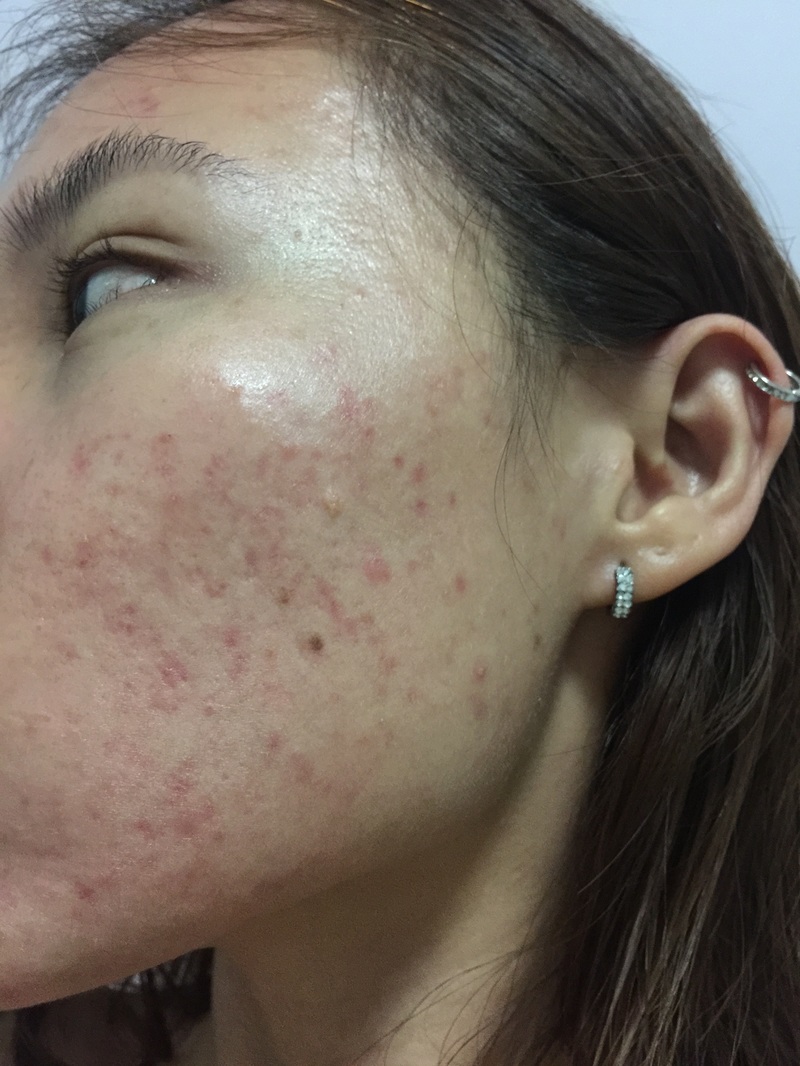
Recovery after 2nd AGNES Acne Treatment (25th July - 30th July)
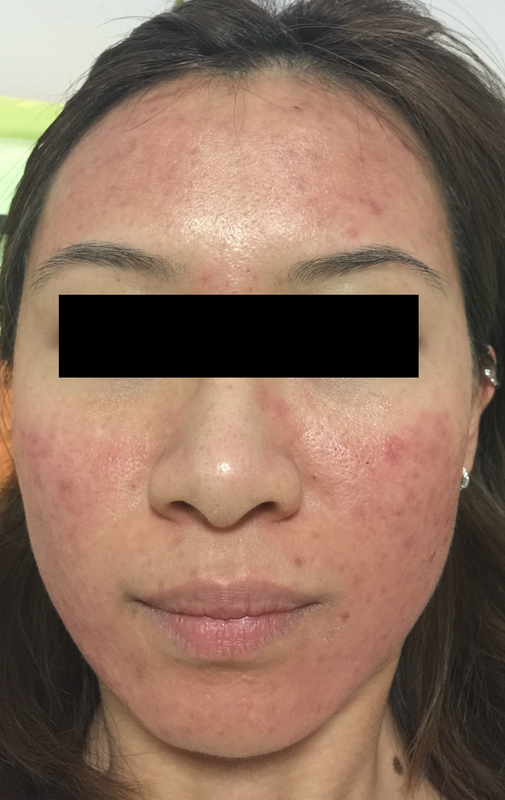
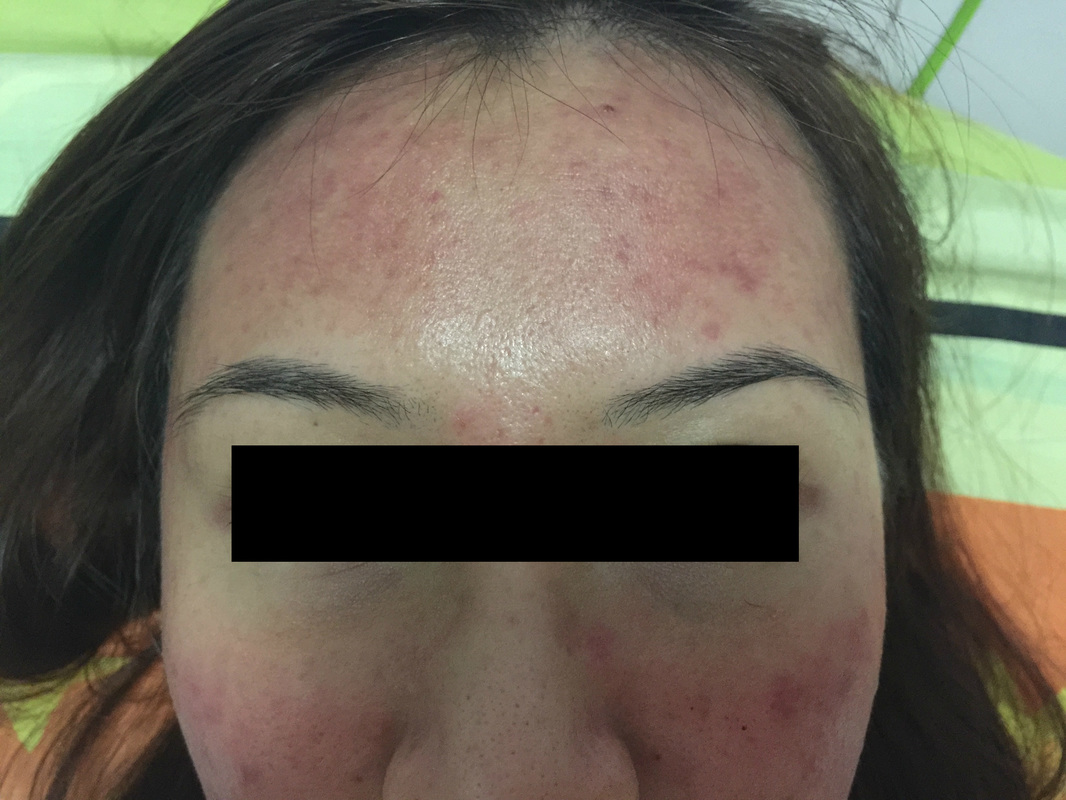
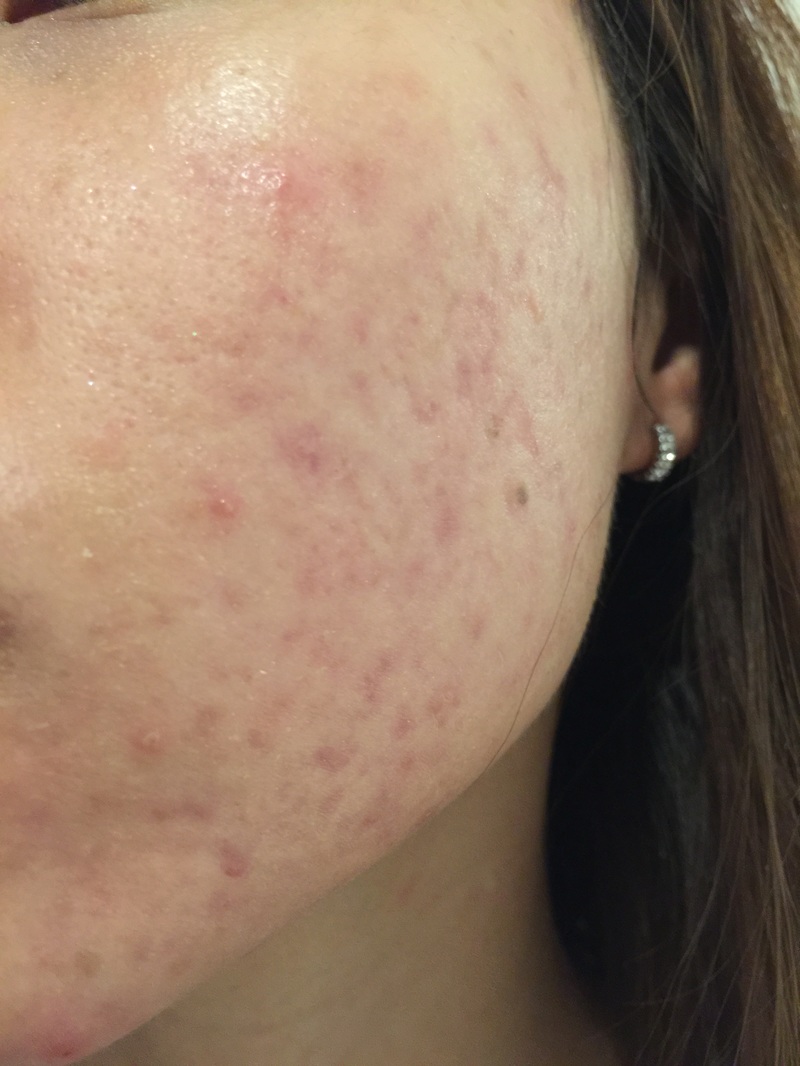
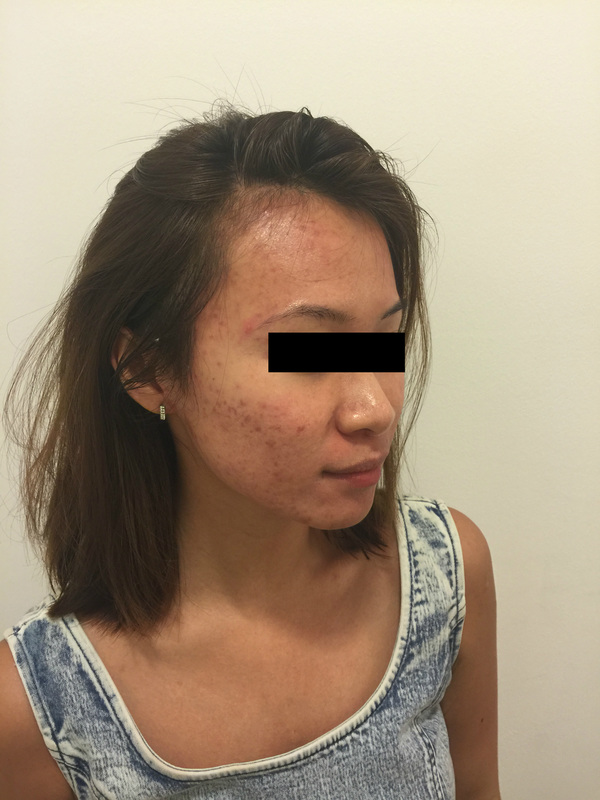
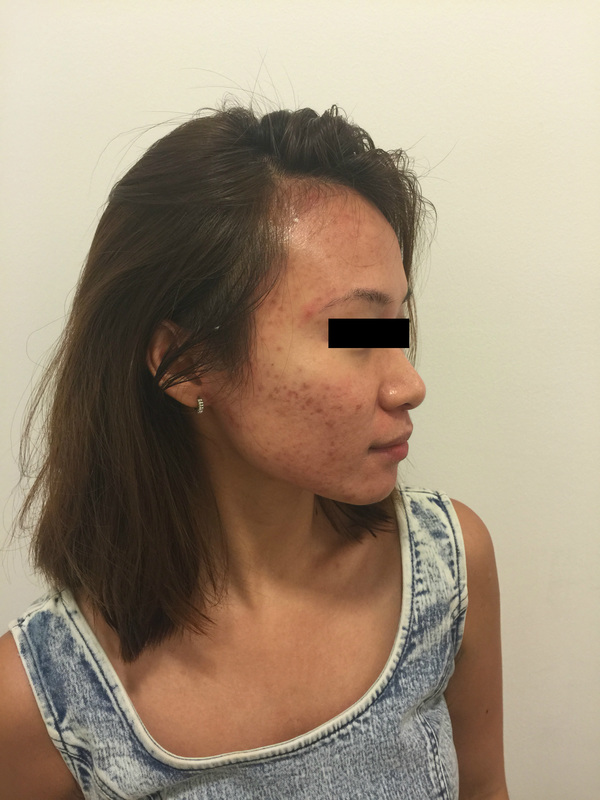
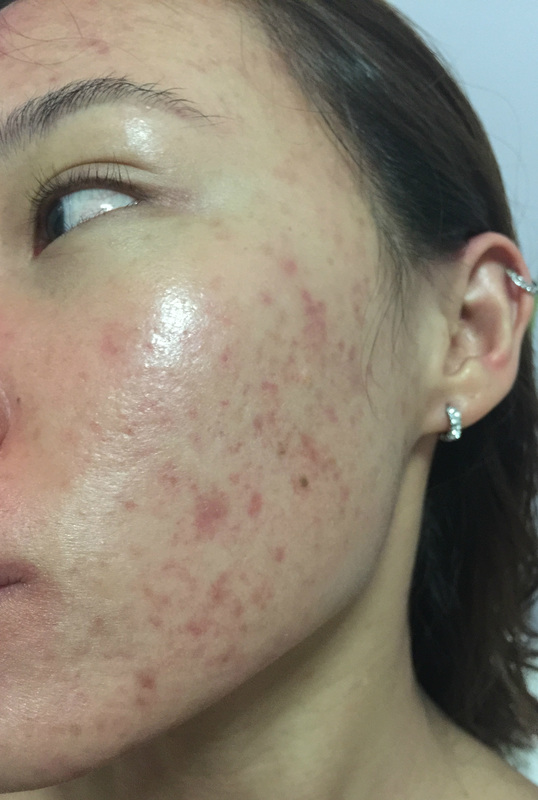
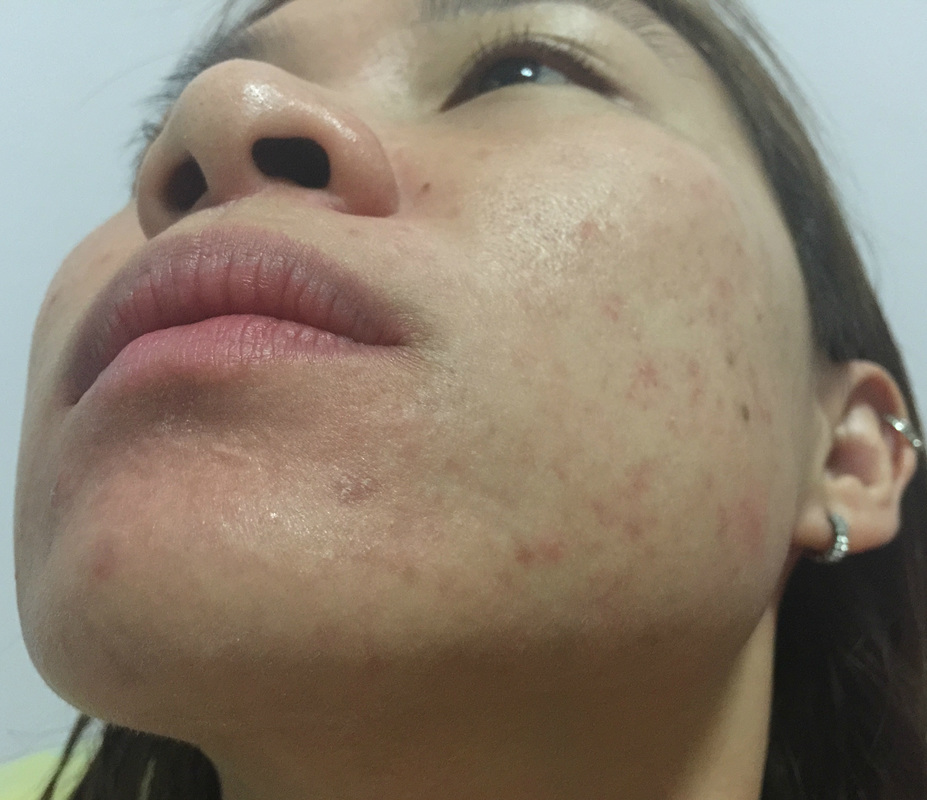
I monitored my skin condition daily after the treatment, and was rather amazed by the swift improvement in my skin clarity. Considering my history of active acne eruption, I have experienced dramatic reduction of acne outbreak since I started my anti-acne treatment with The Clifford Clinic. My skin around my jawline has cleared up and looking at these photos now further affirmed my decision to go for AGNES Acne Treatment was a right one.
Notice how those fresh red marks have gradually turned into brown marks, indicating healing has already begun to take place.

31st July (4th Q-switch)
A week after my 2nd AGNES Acne Treatment, I continued with my Q-switch laser journey as the treatment is proven to be effective in reducing redness and acne marks.
A week after my 2nd AGNES Acne Treatment, I continued with my Q-switch laser journey as the treatment is proven to be effective in reducing redness and acne marks.
 |  |
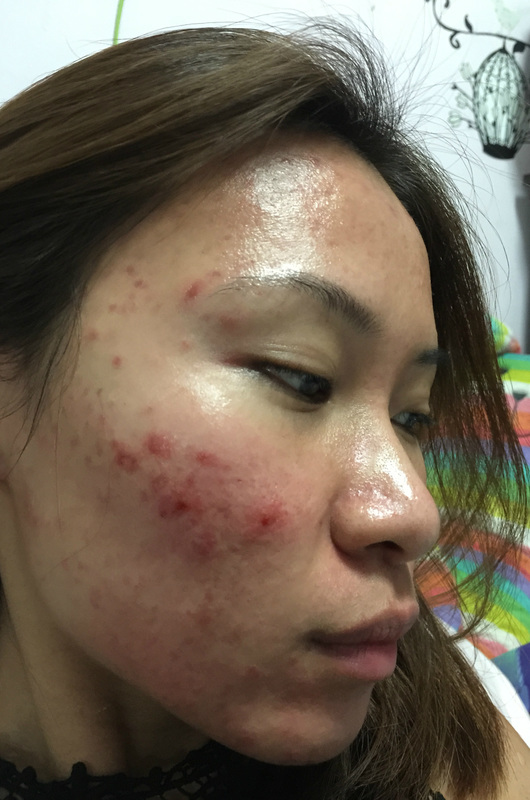
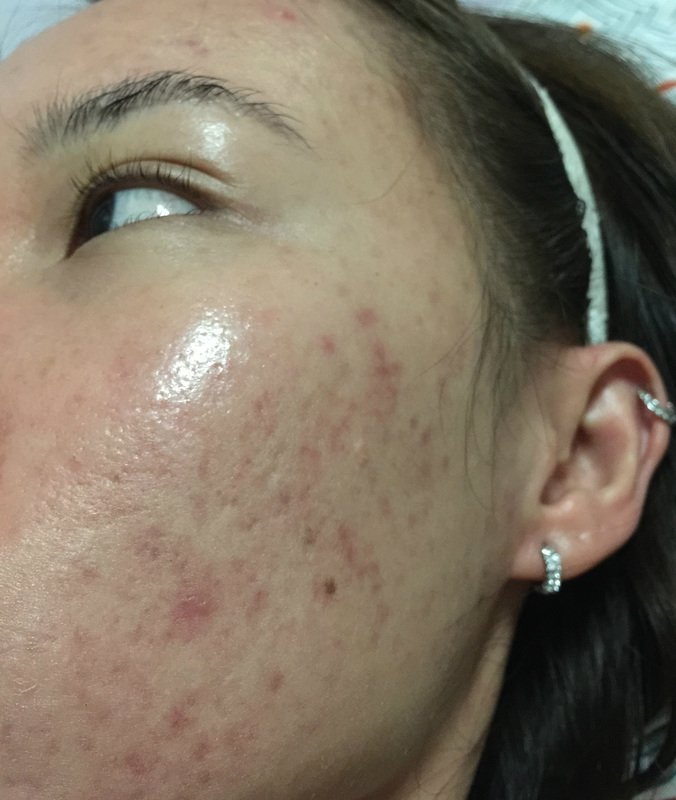
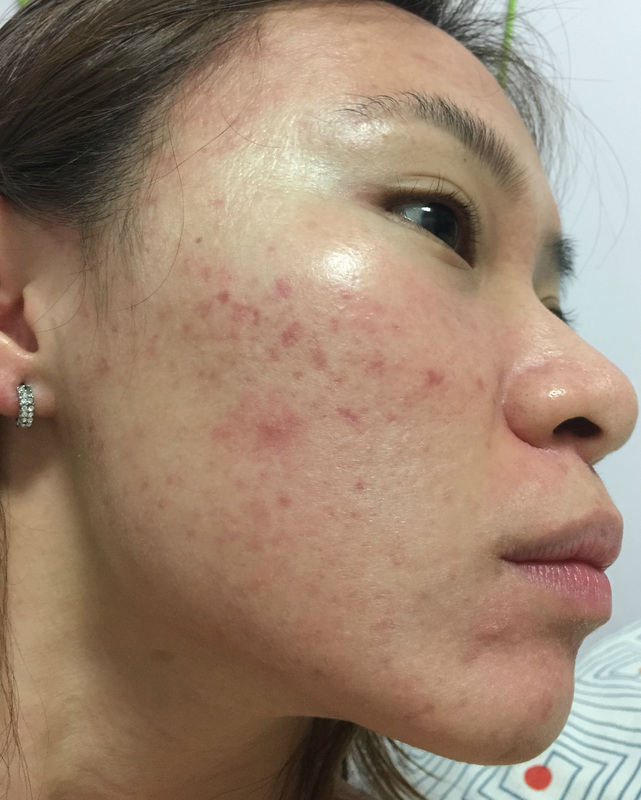
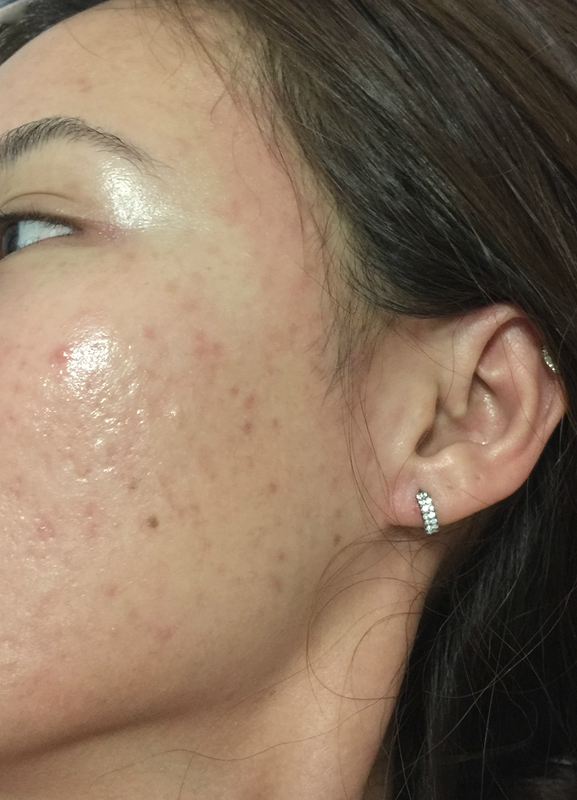
Recovery after 4th Q-switch laser (1st August - 12th August)
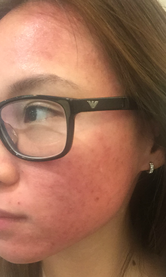
Significant reduction of acne after my 4th Q-switch session!
Significant reduction of acne after my 4th Q-switch session!
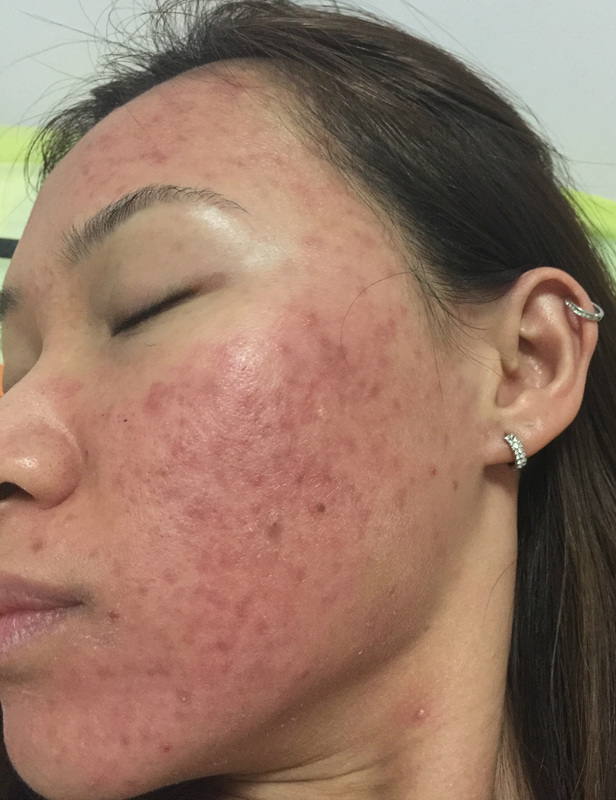
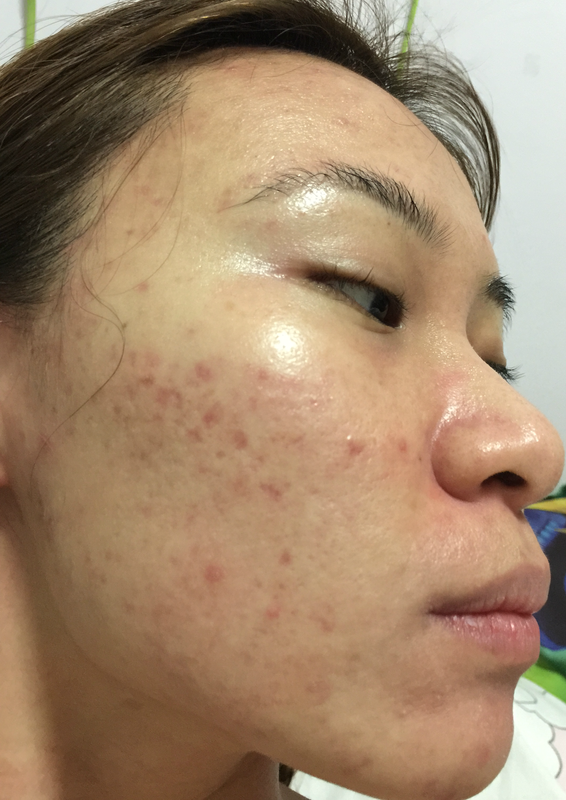
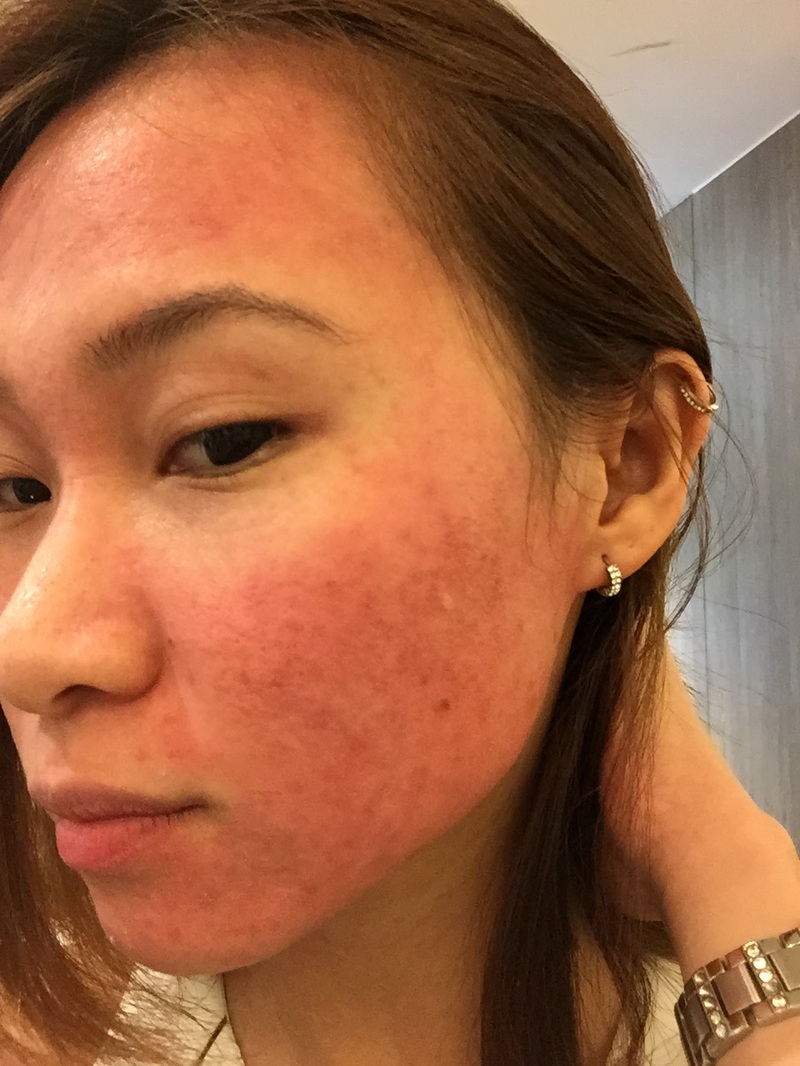
13th August (5th Q-switch)
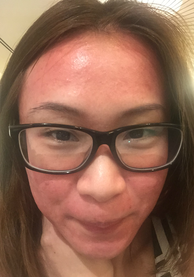
I secretly enjoyed taking photos of my skin flush after every Q-switch session. (:
I secretly enjoyed taking photos of my skin flush after every Q-switch session. (:
 |  |  |
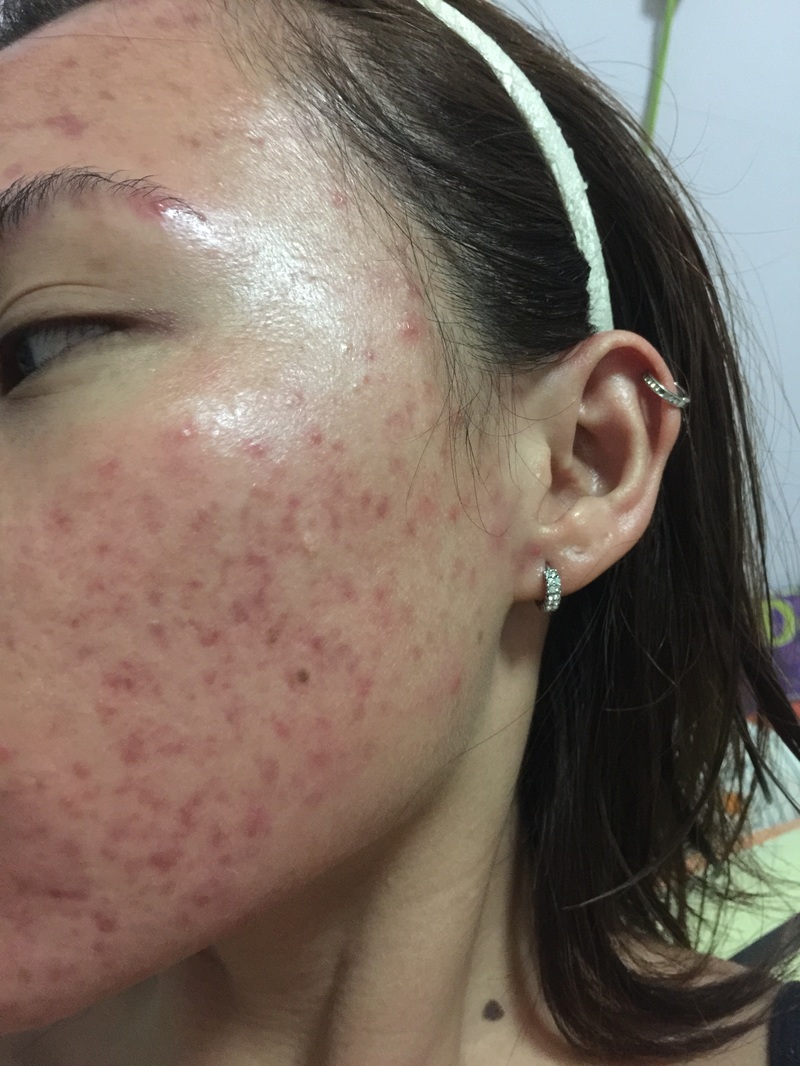
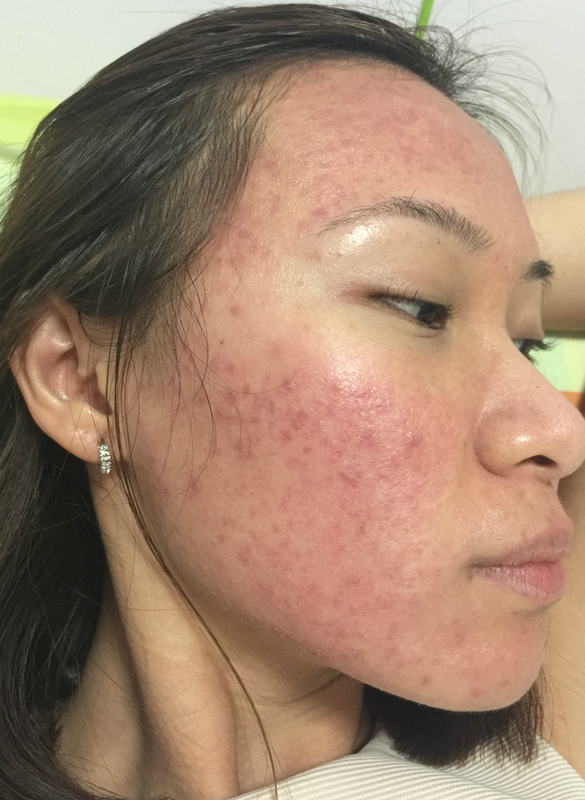
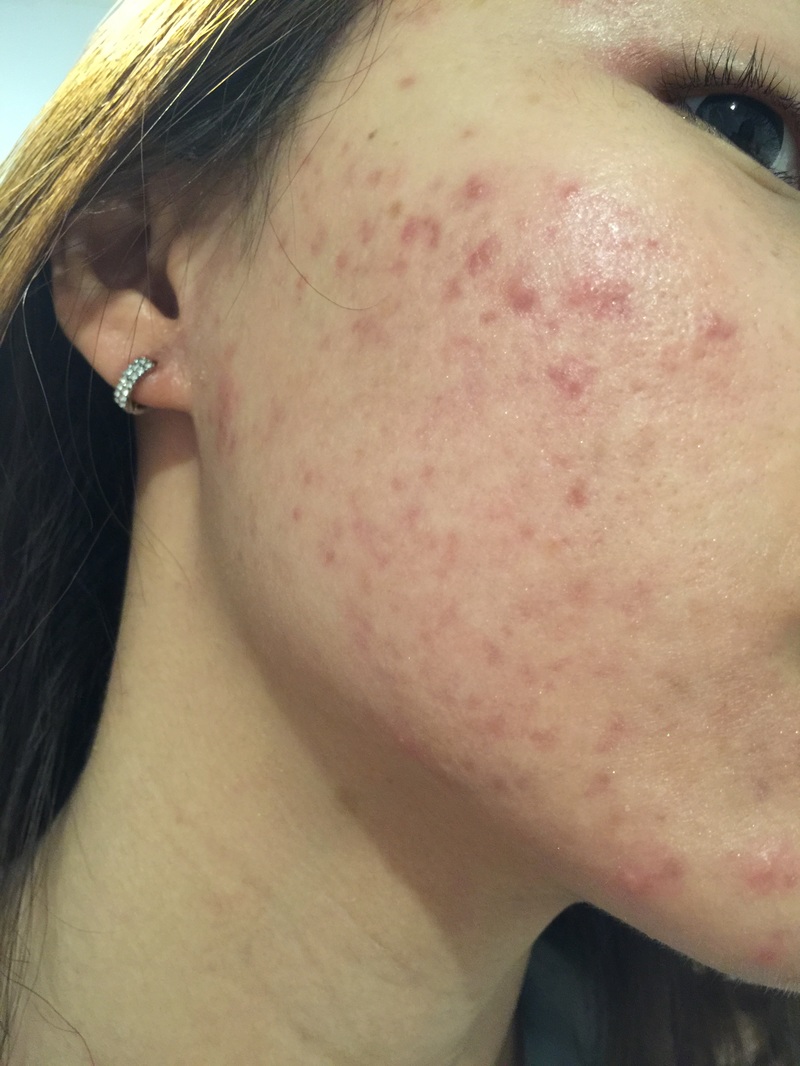
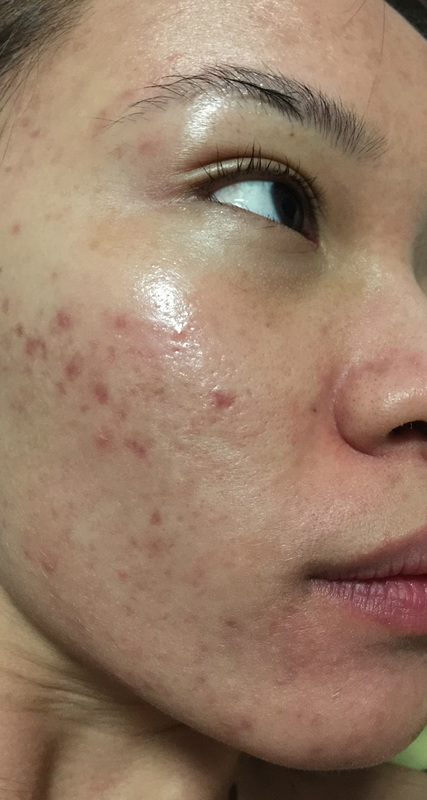
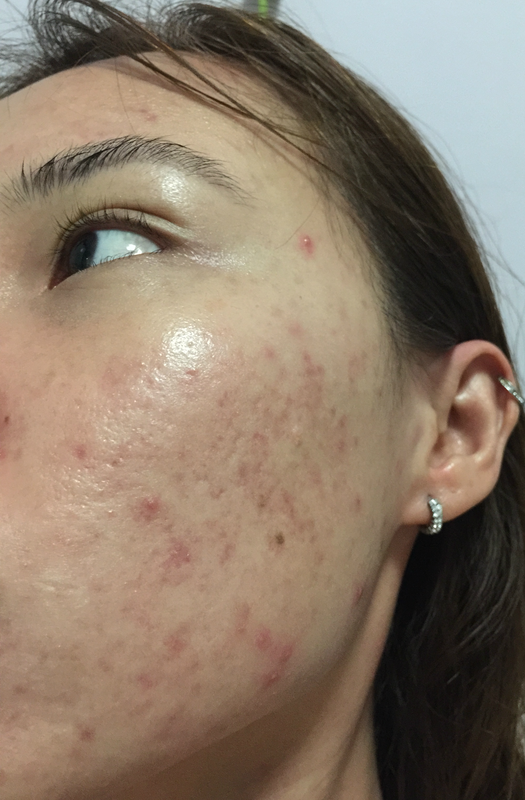
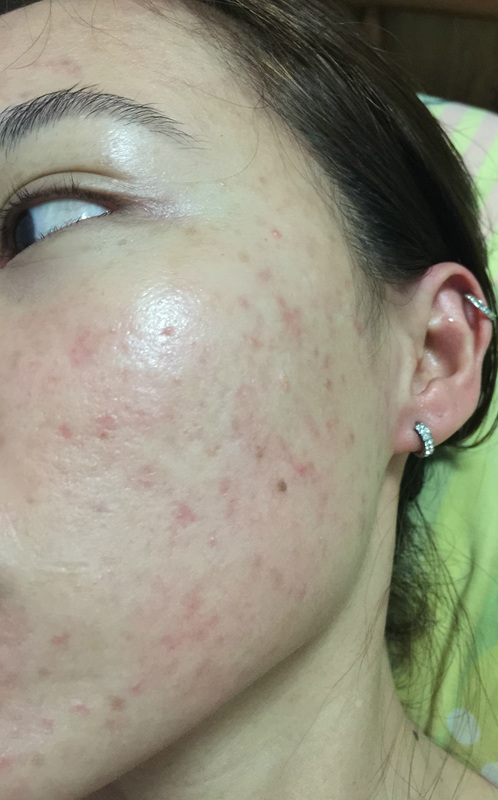
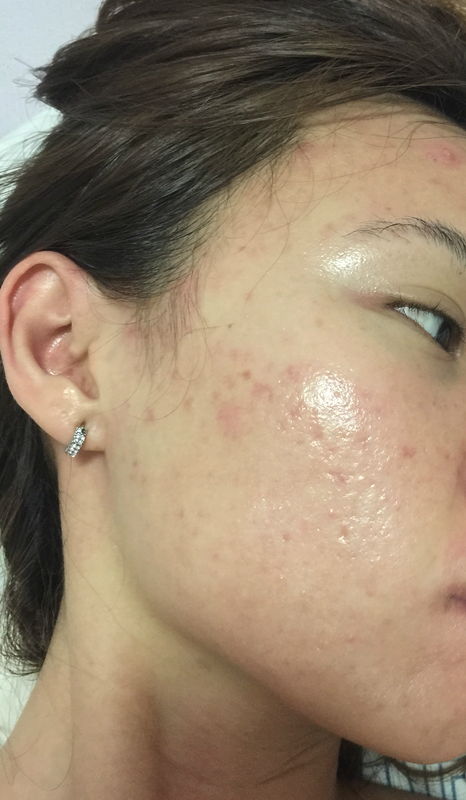
Recovery after 5th Q-switch laser (14th August - 27th August)
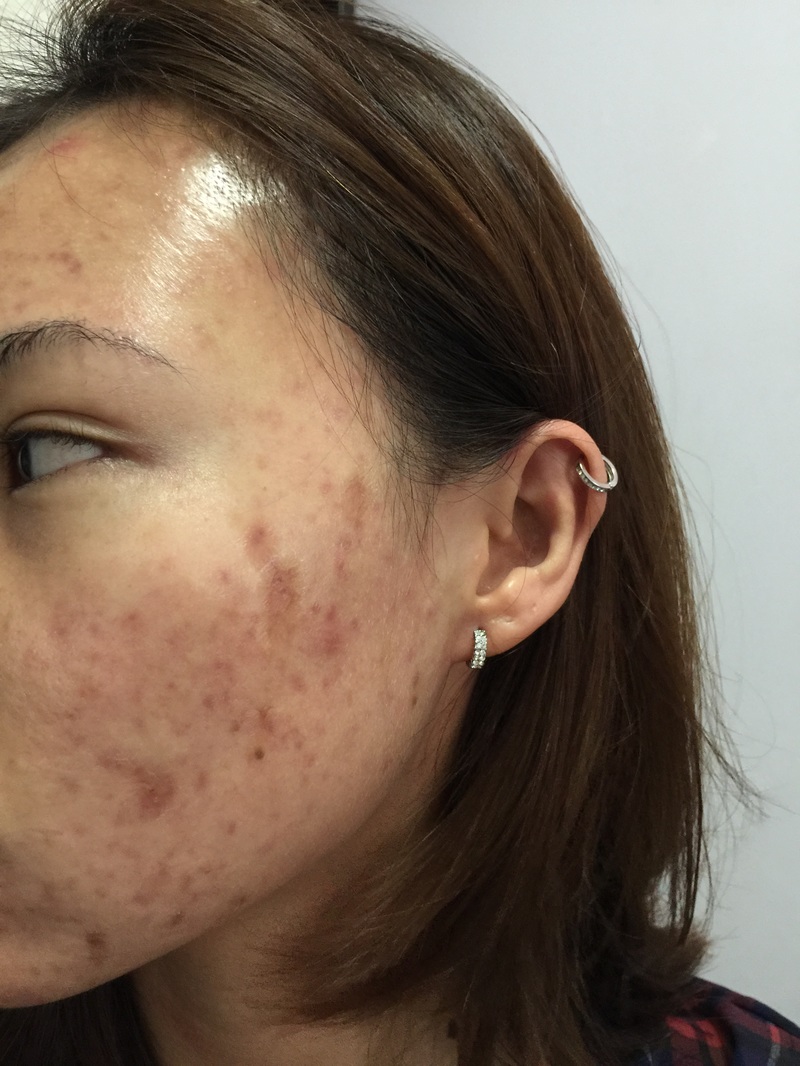
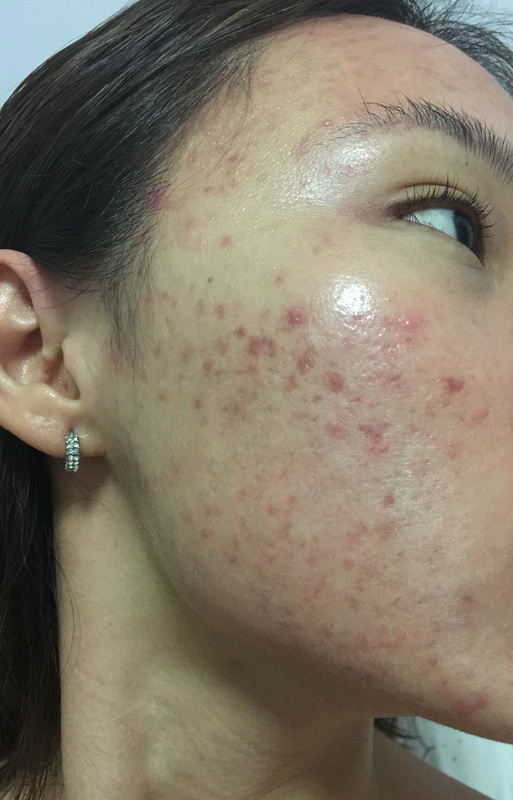
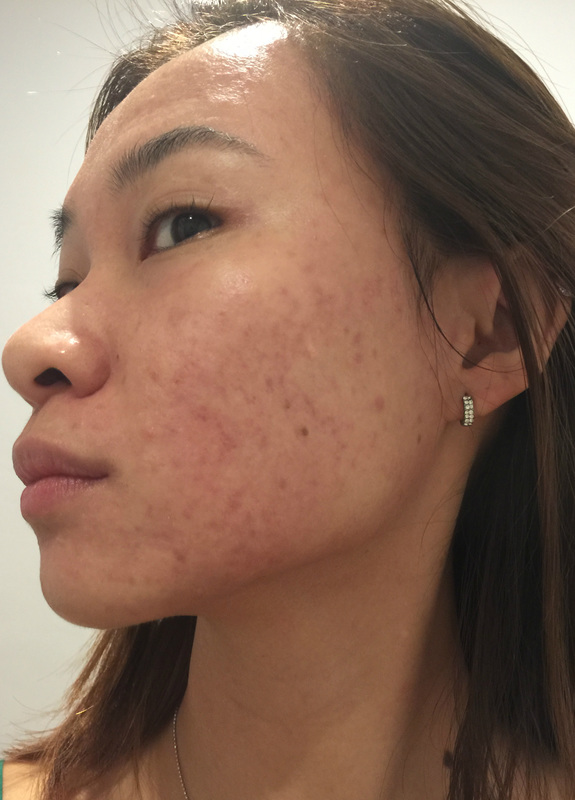
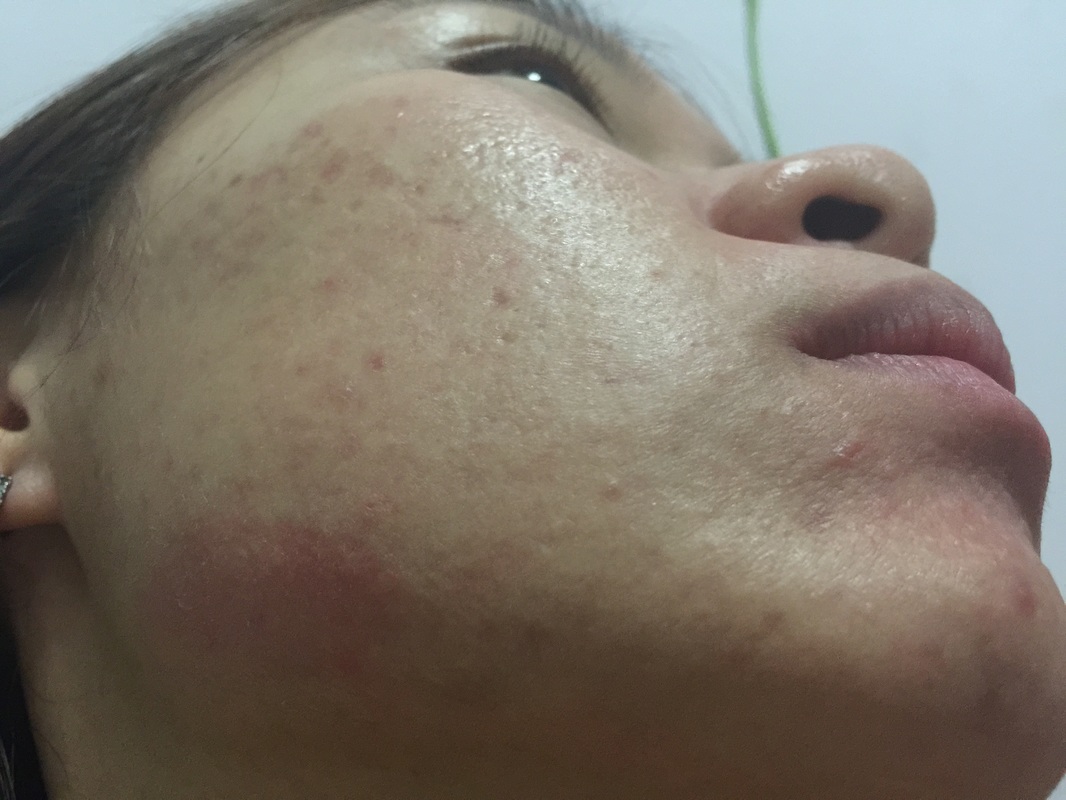
Acne marks have lightened to a large extent, and it was only after my 5th Q-switch session where I started receiving comments about how my skin quality has improved tremendously.
For those who are currently undergoing Q-switch treatments with The Clifford Clinic, have confidence in the treatments and the skills of the two resident doctors - Dr. Gerard and Dr. Chow. With a dose of patience and optimism, I assure you that you will be seeing brighter and clearer skin in no time! (:


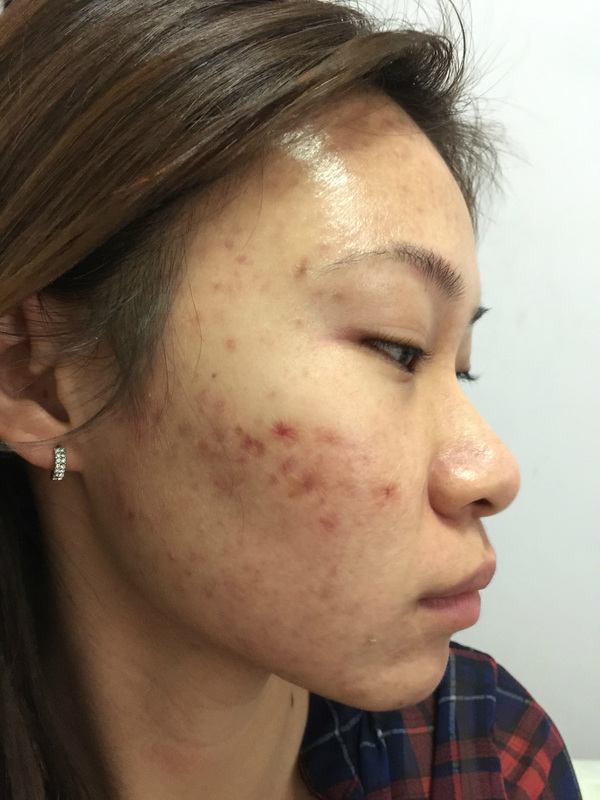
28th August (6th Q-switch)
While I noticed that my acne red marks are fading, I had to deal with some annoying acne outbreaks again. It was very tempting to pop those pimples/acne but even so, I noticed they tend to be less inflamed after Q-switch laser treatments.
While I noticed that my acne red marks are fading, I had to deal with some annoying acne outbreaks again. It was very tempting to pop those pimples/acne but even so, I noticed they tend to be less inflamed after Q-switch laser treatments.
Recovery after 6th Q-switch laser (29th August - 9th September)
Some have asked me how did I get past those self-defeating thoughts and remain so upbeat despite my skin insecurity? Optimism is a happiness magnet, so I try to stay as optimistic as possible, surround myself with positive people who would uplift me with their words. Whenever possible, I also avoid applying makeup so my skin could take a breather over the weekend.
Some have asked me how did I get past those self-defeating thoughts and remain so upbeat despite my skin insecurity? Optimism is a happiness magnet, so I try to stay as optimistic as possible, surround myself with positive people who would uplift me with their words. Whenever possible, I also avoid applying makeup so my skin could take a breather over the weekend.
10th September (7th Q-switch)
I've crossed the halfway mark on my acne-free journey! Very soon, acne and acne marks will be a thing of the past!
I've crossed the halfway mark on my acne-free journey! Very soon, acne and acne marks will be a thing of the past!
Recovery after 7th Q-switch laser (11th September - 30th September)
It usually takes a minimum of five treatments to make acne marks go away completely but they can lighten up significantly even after just one treatment.
It usually takes a minimum of five treatments to make acne marks go away completely but they can lighten up significantly even after just one treatment.
With each session of Q-switch laser treatment with The Clifford Clinic, I've seen tremendous improvement in my skin imperfections and clarity of skin tone. I've been receiving compliments on my skin improvement, and even had people telling me my skin looks super radiant! (Although I think the radiance stems from the production of my facial oil!)
Before I end this blog entry, I thought a side-by-side comparison of my treatment photos over the course of 3.5 months with The Clifford Clinic would do justice to the efficacy of these treatments. All of us have different 'healing factor' ability, some will heal at an accelerated rate, while others may take a longer time. Mine would be classified under ultra poor healing. But boy was I amazed with the transformation of my complexion after looking at these photos!
Right side
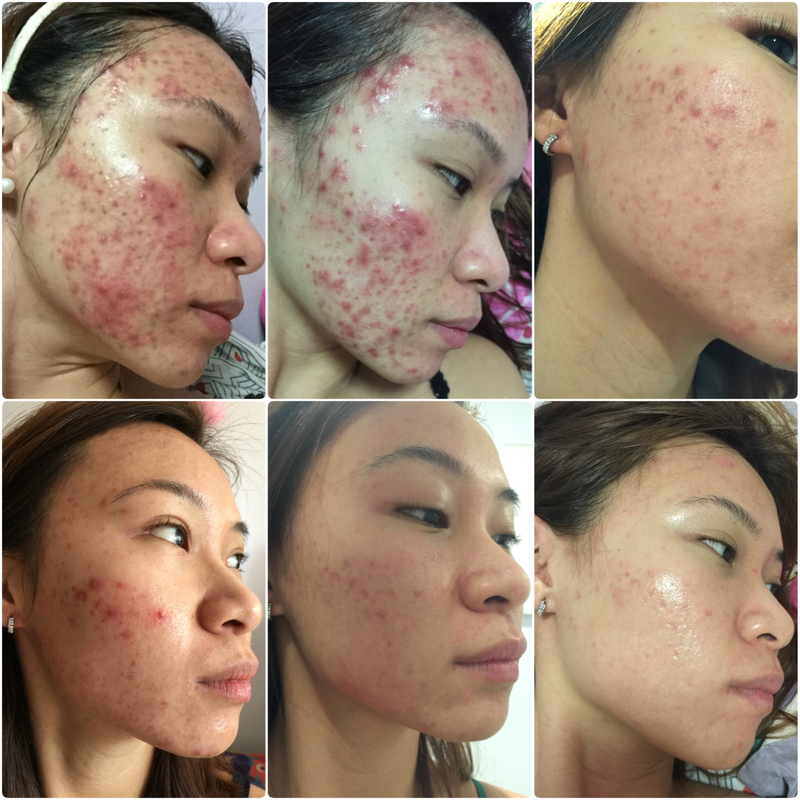
Left side
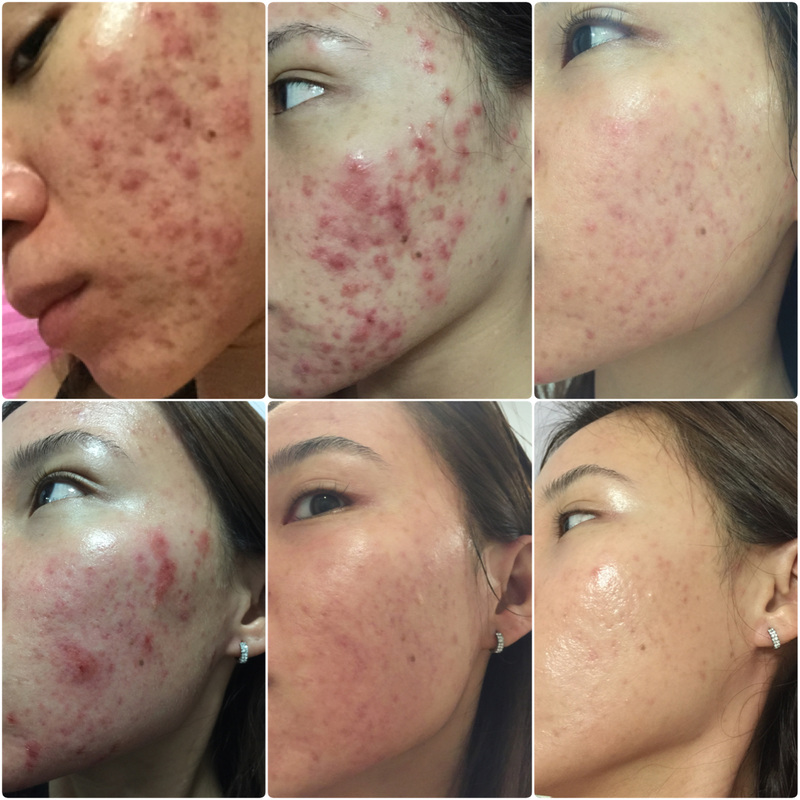
Skin Health Index before embarking on my acne treatment: NEGATIVE % )))))):
Skin Improvement Index at the present: 80%
My skin isn't perfect but it's a lot more happier and brighter after I started treatments with The Clifford Clinic. It's the perfect beauty pit stop to get me clear glowing skin with minimal downtime. I will continue to monitor my skin condition and will share an update on the final part to my acne-free journey in one of my subsequent posts.
The Clifford Clinic
Opening Hours: Mon to Fri: 10am to 8pm | Sat: 10 am to 2pm | Sun: Closed
Address: 24 Raffles Place, #01-03 Clifford Centre, Singapore 048621
Tel:+65 6532 2400
Website: www.cliffordclinic.com | Email: [email protected]
Opening Hours: Mon to Fri: 10am to 8pm | Sat: 10 am to 2pm | Sun: Closed
Address: 24 Raffles Place, #01-03 Clifford Centre, Singapore 048621
Tel:+65 6532 2400
Website: www.cliffordclinic.com | Email: [email protected]
 RSS Feed
